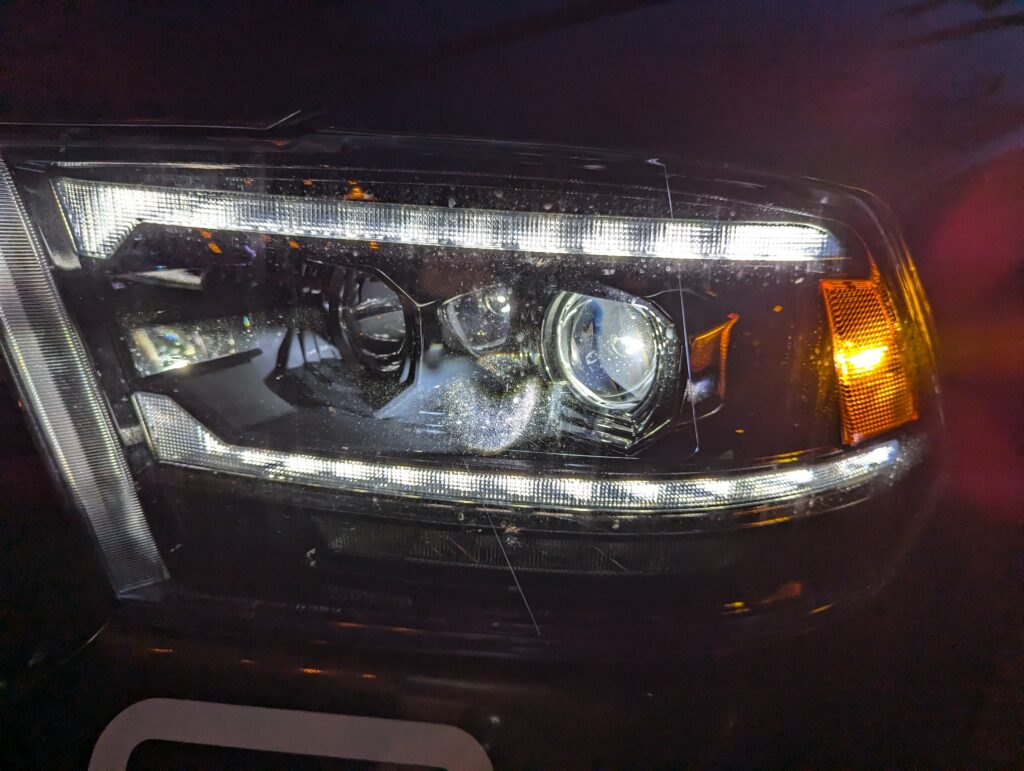
Recently I installed a new set of headlights on my Ram 1500, the Alpharex Luxx. I noticed some oddities in the lights functionality though. I’ll walk you through configuring the Body Control Module (BCM) on a Ram 1500 to make Alpharex headlights function as expected. This guide is especially useful if you had the factory RAM projector headlights, as Alpharex’ existing documentation primarily focuses on standard quad lights. For reference, I performed this configuration on my 2014 Ram 1500, but the steps should apply to models from 2009 to 2018.
Important Warnings
Using AlfaOBD can be dangerous and could result in a trip to the dealer if not done correctly. Always ensure you understand the changes you are making and proceed with caution. It’s advisable to run a full BCM backup, and document any settings you modify so you can revert them if necessary.
Tools and Parts Needed
To get started, you’ll need the following tools and parts:
- AlfaOBD app (available for Android or Windows)
- OBDLink MX+ (or other AlfaOBD compatible device)
- Alpharex headlights
- Adapter harness for factory projector headlights
Important Notes
- Some newer Rams may require a security bypass harness.
- In Canada, DRLs are required and enabled by default, but the DRL from the harness may not work without additional configuration using AlfaOBD.
Initial Setup
Before diving into the BCM configuration, ensure you have installed the Alpharex headlights and connected the adapter harness. A key point to note is that the adapter harness for factory projector headlights includes the DRL (Daytime Running Light) line, so running a separate harness to the fuse box, as outlined in Alpharex documentation, is unnecessary.
Common Issues and BCM Configuration
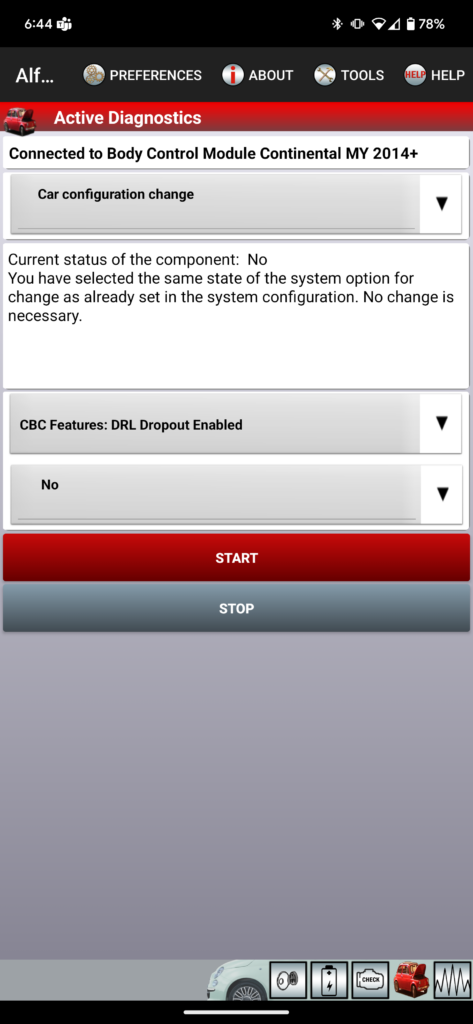
One noticeable issue I had right off the bat is the activation sequence of the headlights repeating each time you use the turn signals. This problem can be resolved by disabling DRL Dropout using the AlfaOBD app.
Step-by-Step BCM Configuration
- Download and Install AlfaOBD:
- Purchase and download the AlfaOBD app for your preferred platform (Android or Windows).
- Install the app on your device.
- Connect OBDLink MX+:
- Plug the OBDLink MX+ into the OBD-II port of your Ram 1500.
- Connect your device to the OBDLink MX+ via Bluetooth or Wi-Fi, depending on your device setup.
- Open AlfaOBD and Select Your Vehicle:
- Launch the AlfaOBD app and select “RAM 1500 (DS/DX/DT)” as your vehicle.
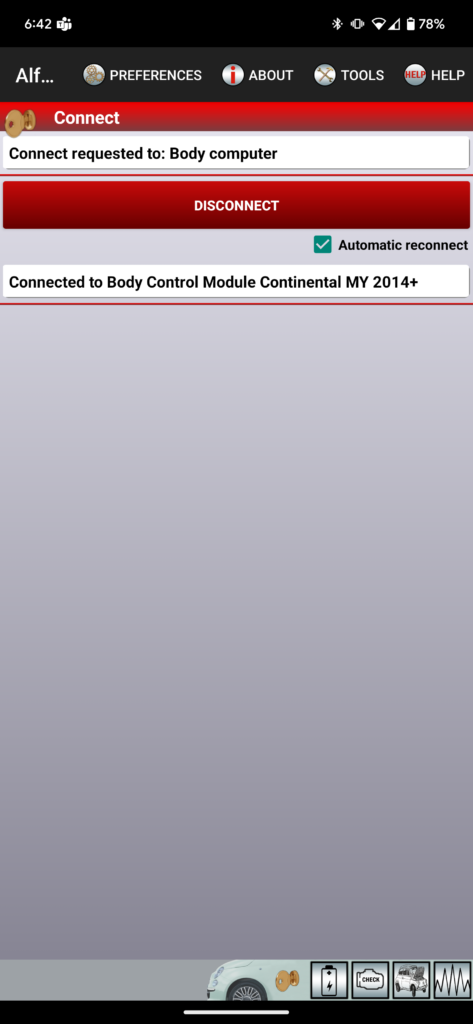
- Navigate to the “Body Computer” section and select “My2013+ PowerNet.”
- Click “Connect” to establish the connection.
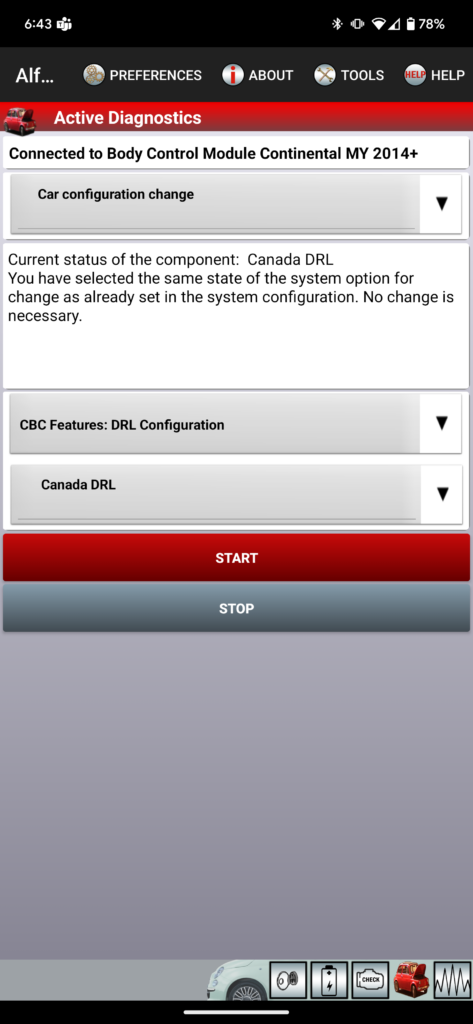
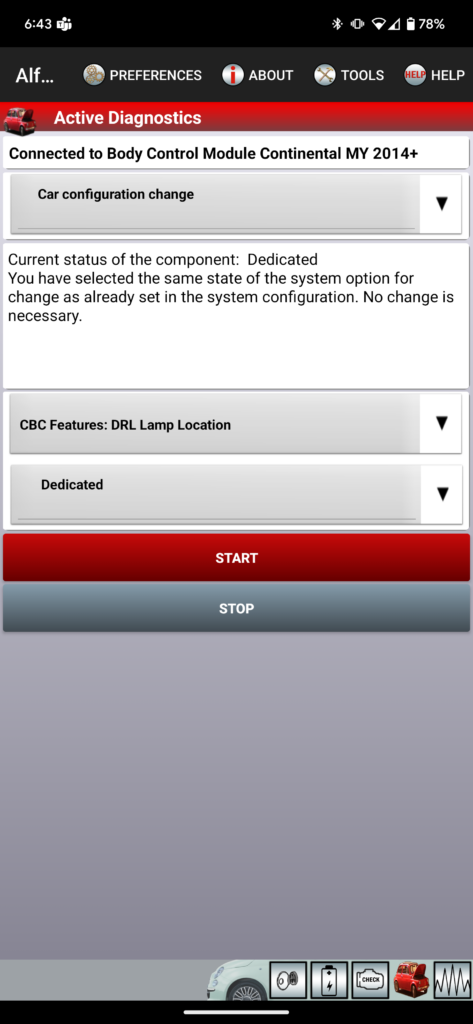
- Access the Car Configuration Change:
- Once connected, click the icon at the bottom that looks like a car with the hood up.
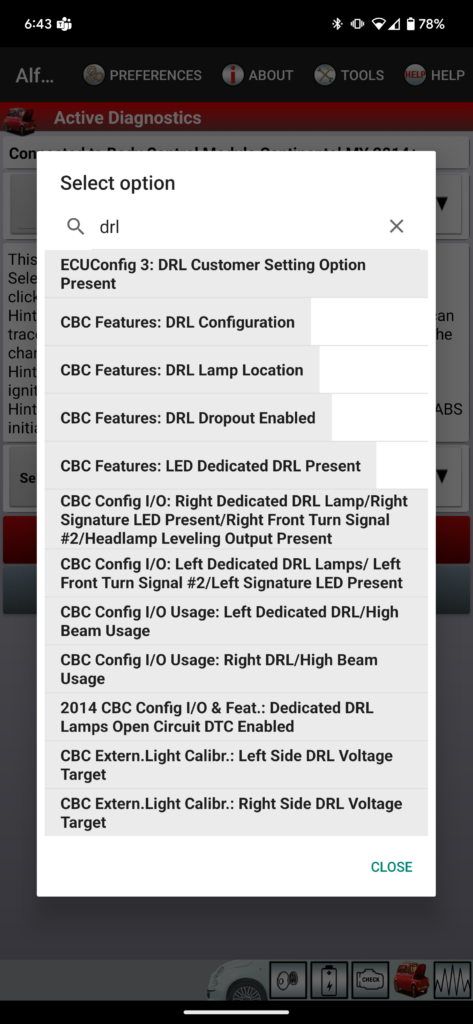
- In the “Select Procedure” menu, choose “Car Configuration Change.”
- Adjust DRL Settings:
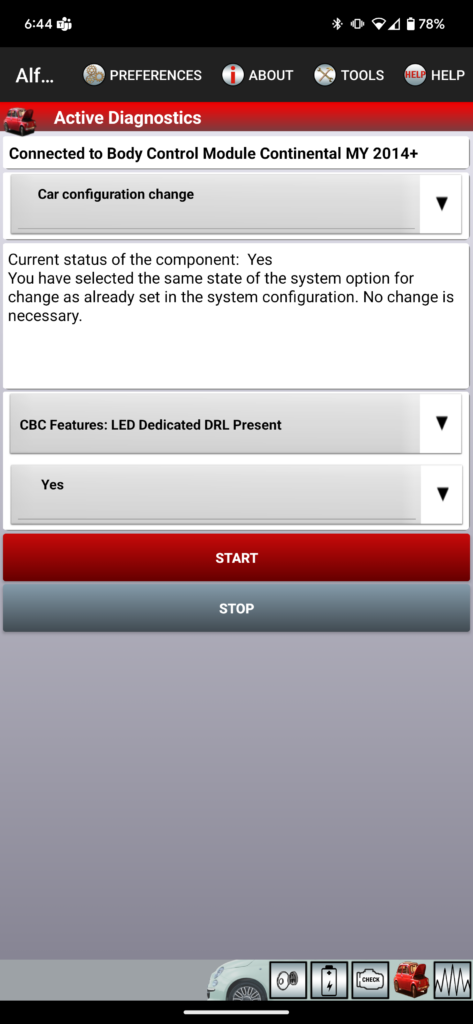
- Set “LED Dedicated DRL Present” to “Yes.”
- Set “DRL Dropout Enabled” to “No.”
- Set “DRL Lamp Location” to “Dedicated.”
- Set “DRL Configuration” to “Canada” (or “Optional DRL” depending on your location).
- Save Changes and Reset:
- Save the changes made in the AlfaOBD app.
- Turn off the ignition, open the door, exit the vehicle, and leave it alone for about 5 minutes to allow the BCM to take the changes.