If there’s one thing I’ve learned about Anycubic printers, it’s that they love to upgrade faster than I can keep up. I bought the Anycubic Kobra 1 about a year ago, and now they’re already on the Kobra 3. And here I am, still trying to squeeze more life out of my Kobra 1.
Before we start, let me stress – this guide is for the Kobra 1 specifically – not the Kobra GO, not the Kobra Max, just the good ol’ Kobra 1. Each of those models may (or may not) have different boards and configs, so your mileage may vary.
Anycubic Kobra Specs
- Build Volume: 220 x 220 x 250 mm
- Print Speed: Up to 180 mm/s (recommended 60-100 mm/s)
- Layer Resolution: 0.05-0.3 mm
- Nozzle Diameter: 0.4 mm (standard)
- Printing Materials: PLA, ABS, PETG, TPU
- Hotend Temperature: Up to 260°C
- Heated Bed Temperature: Up to 110°C
- Bed Leveling: Automatic leveling with inductive sensor
- Extruder Type: Direct drive
- Display: 4.3-inch color touch screen
- Connectivity: USB, microSD card
- Motherboard: Trigorilla Pro A v1.0.4 (for most Kobra 1 units)
Why Klipper?
After wrestling with failed prints and endless tinkering, I almost gave up on my Kobra 1. But then someone recommended I give Klipper a try. If you’re not familiar with it, Klipper is a 3D printer firmware that pairs a regular computer with your printer’s microcontrollers, unlocking a whole new level of control. Here’s why you might want to consider it:
- Superior motion control – Your printer moves smoother and faster.
- Multi-controller support – Run additional hardware, like a secondary controller for complex tasks.
- Pressure advance – Helps with stringing issues by controlling how filament pressure changes.
- Input shaping – Reduces print vibrations, which means cleaner prints.
- Extremely customizable – You can tweak just about everything.
After all that research, I went full steam ahead with the plan. But then reality set in: getting Klipper running on a Kobra 1 is not as simple as most other 3D printers. That’s because Anycubic made some, shall we say, interesting choices with their boards.
Anycubic’s 2208 Driver Fiasco
Here’s where things get a little technical (but bear with me, it’s important). On the Kobra 1, Anycubic used a mix of TMC2209 drivers and one TMC2208 for the extruder. That in itself wouldn’t be a huge problem if they hadn’t assigned both the X-axis and the extruder the same address – address 0.
In Klipper’s world (or really probably any 3rd party firmware), this causes an issue because Klipper likes to verify that it can read from the stepper drivers. But since both the extruder and the X-axis are sharing an address, Klipper can’t reliably read from them, leading to conflicts and general firmware sadness.
The fix? You need to resolder a resistor, specifically moving R65 to R66. If you’re not into SMD soldering (like me), R65 is actually a 0-ohm resistor, meaning we can replace it with something simpler – a wire bridge.
Opening Up the Kobra 1
Before you start thinking about soldering, let’s get to the hardware side of things.
- Flip the printer on its back – Make sure it’s stable and that you’re not crushing any important parts.
- Remove the bottom cover – Use a 2.0mm hex key to loosen the screws holding the cover.
- Unplug the fan – The fan is attached to the cover, so be sure to disconnect it.
- Take a good look at the motherboard – On my Kobra, I found a Trigorilla Pro A v1.0.4 board. Your Kobra might have a different version, so take note before you keep going.
- Disconnect the wiring plugs – Be mindful of where each wire goes. I recommend labeling them so you can reassemble easily.
- Cut through the glue – If you’re lucky, Anycubic didn’t go wild with glue. I wasn’t so fortunate. Carefully use a sharp knife to remove the glue from the connectors without damaging them.
- Remove the motherboard – Use a 2.5mm hex key to loosen the screws (there are four of them) and pull out the board.
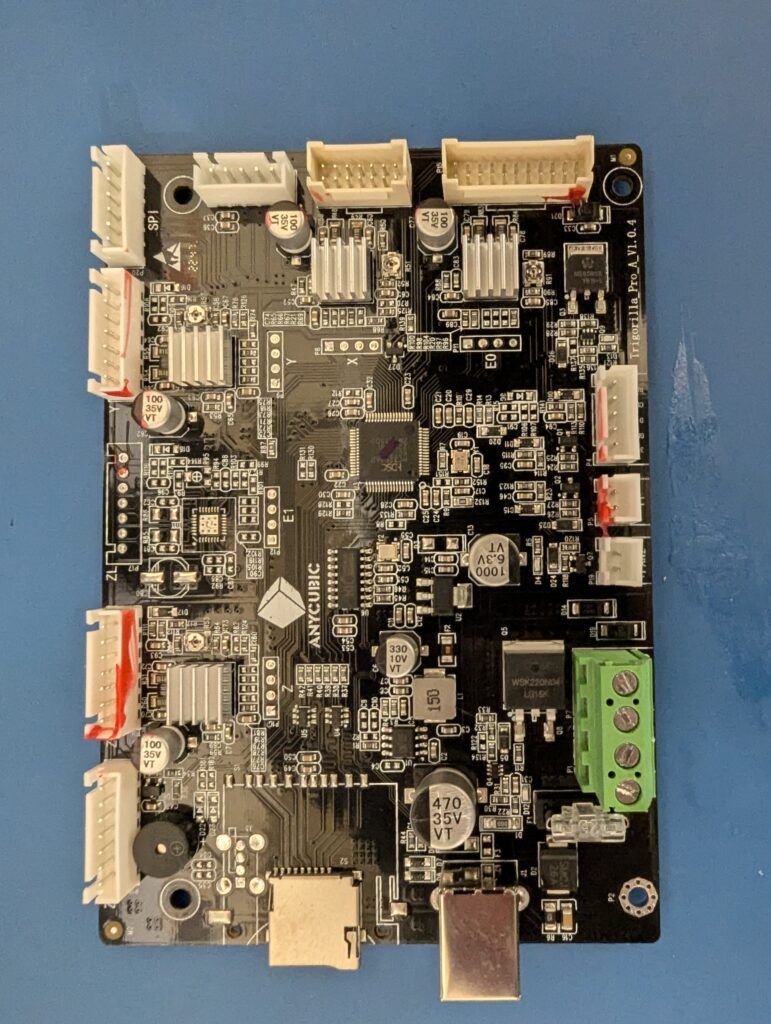
Fixing the Driver Conflict: Resoldering or Bridging
Now we get to the fun part: fixing that driver conflict.
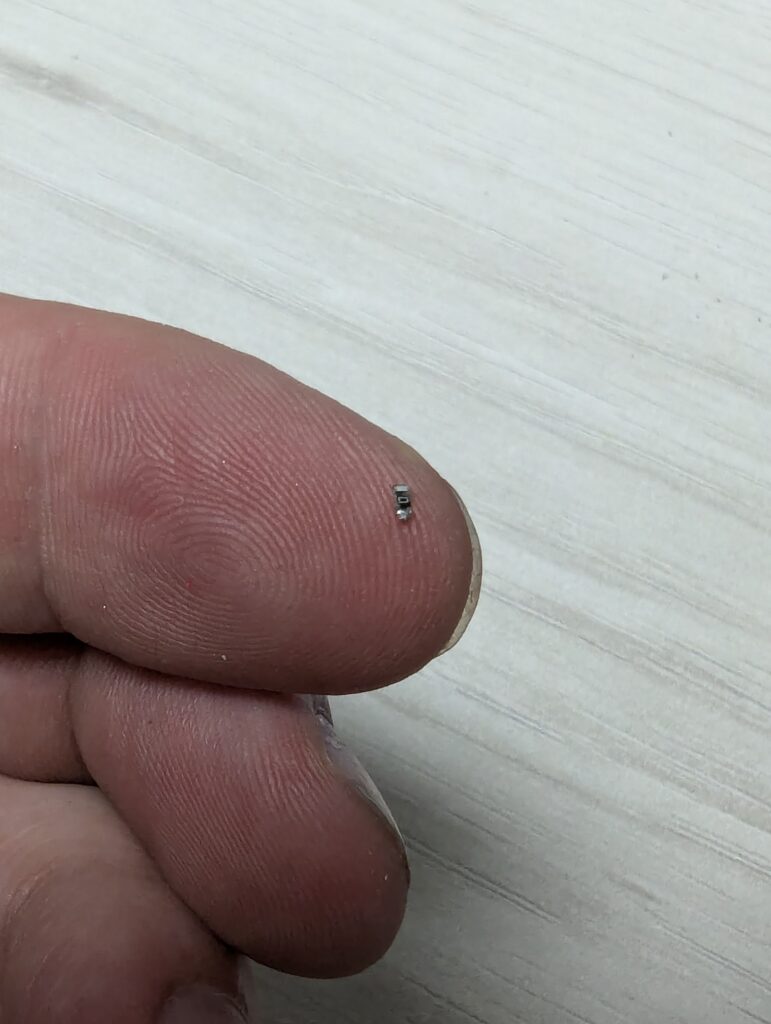
If you’re confident in your SMD soldering skills, go ahead and resolder R65 to R66. But if you’re like me and prefer not to deal with tiny SMD components, just bridge the pads with a piece of wire.
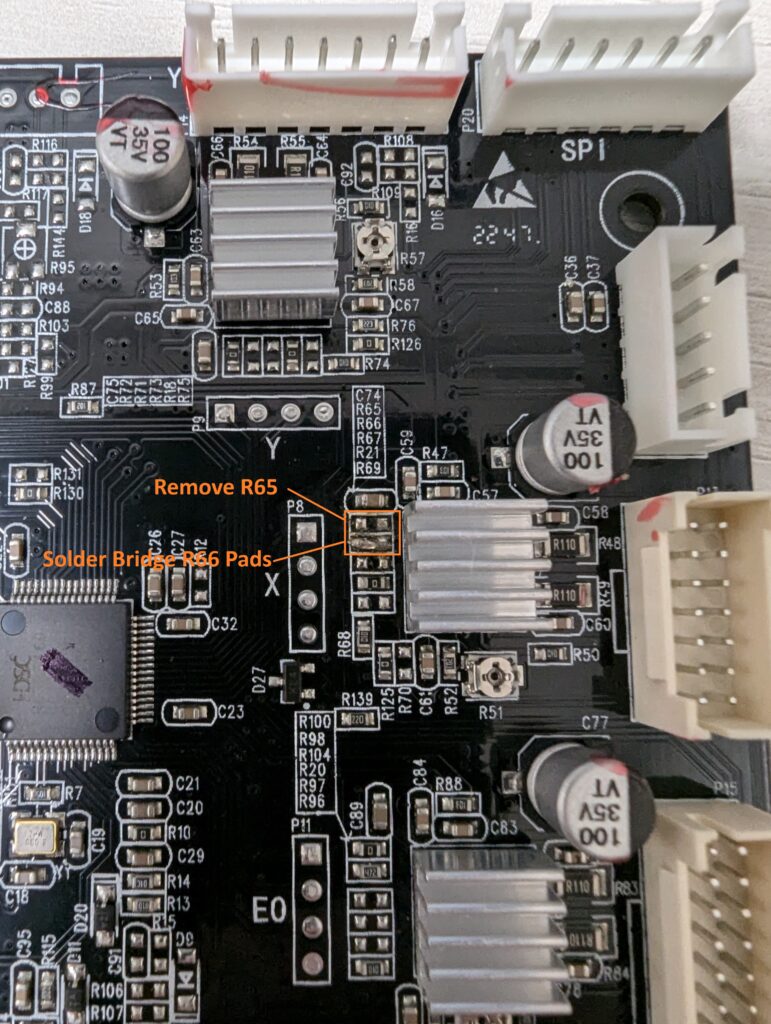
Once that’s done, reassemble everything by screwing the motherboard back in and reconnecting all the wires.
At this point, there’s really no turning back, unless you find modified Marlin firmware for the Kobra – which does exist as well!
Installing Klipper on the Kobra 1
Now that the hardware fix is complete, let’s move on to the software side of things. Klipper recommends using a Raspberry Pi or another Small Board Computer (SBC) as the host. For my setup, I used an old Lenovo 2-in-1 laptop running Debian. You’ll want to avoid using desktop versions of Linux and go for something lightweight like RPiOS Lite or Ubuntu Server.
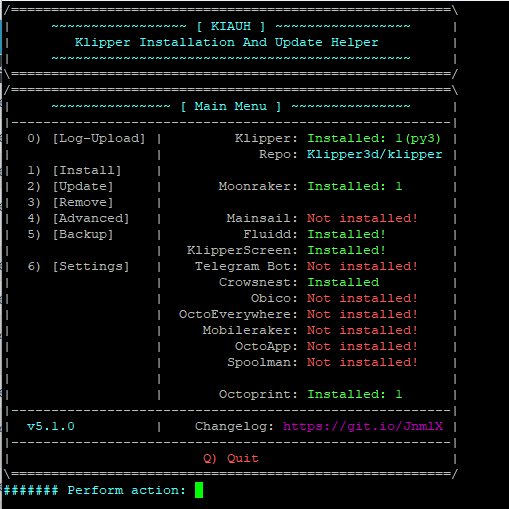
I used KIAUH (Klipper Installation And Update Helper) to install Klipper, and it’s pretty straightforward if you’re familiar with Linux. Here’s how you get started:
- Install Git:
sudo apt-get update && sudo apt-get install git -y - Download KIAUH:
cd ~ && git clone https://github.com/dw-0/kiauh.git - Run KIAUH:
./kiauh/kiauh.sh
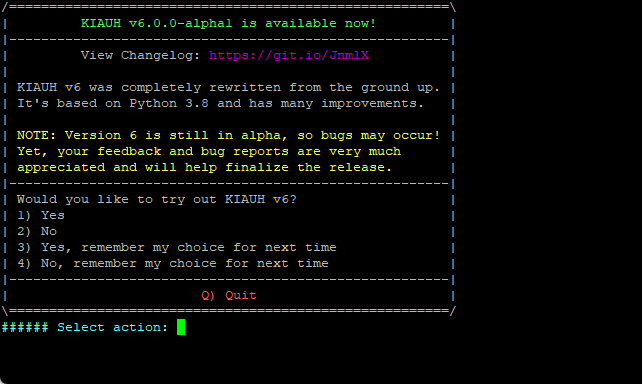
You’ll be prompted to install the alpha version of Klipper, but I opted for the stable version. Alpha versions are great for experimenting, but since we’re already trying to fix issues, stability is key. I also installed Klipperscreen for viewing and control and Fluidd for the web interface.
Compiling the Firmware for Klipper
Now it’s time to compile the firmware for the Kobra 1. Run the following commands on your host device (the SBC or laptop):
- Navigate to the Klipper folder:
cd ~/klipper/ - Open the configuration menu:
make menuconfig
Select the following settings:
- Micro-controller: Huada Semiconductor HC32F460
- Communication interface: Serial (PA3 & PA2)

Press Q to quit, save the config, and then type:
make
The firmware will compile, and you’ll end up with a file named klipper.bin. Rename it to firmware.bin, and copy it to an SD card.
Flashing the Firmware
Here’s where things can go sideways if you’re not careful. Make sure the printer is disconnected from USB before flashing the firmware, or the process may fail.
- Power off the printer and remove the USB connection.
- Insert the SD card into the printer (not the LCD screen).
- Power on the printer. It should beep 5 times, and the screen will show the splash screen. I left it like this for about five minutes to be sure the flash was successful (just based on my flashing experience with the factory Anycubic firmware).
- Power off the printer, remove the SD card, reconnect the USB, and power it back on.
At this point, the screen will no longer function, but that’s expected. The printer should now be running Klipper firmware!
Configuring the printer.cfg File for Klipper
Once Klipper is installed on our host and the firmware is flashed, the next step is configuring the printer.cfg file. This configuration file essentially tells Klipper how to communicate with your printer’s hardware. Since there isn’t an official configuration file for the Kobra 1, I used a Kobra Plus configuration as a base file from the Klipper GitHub repository and modified it for the Kobra 1.
Here’s what you need to do:
- Obtain the Kobra Plus Configuration:
You can find theprinter.cfgfor the Kobra Plus on the Klipper GitHub repository:
Kobra Plus Printer Config. - Open Fluidd: Once you’ve flashed the firmware and connected the printer, open Fluidd (the web interface) by entering the host IP in your browser. This is where you’ll upload the
printer.cfgfile. - Modify the Configuration: You will need to adjust the following sections to ensure they match the Kobra 1’s specs:
- Microcontroller settings: Ensure the microcontroller type matches the one in your Kobra 1 (HC32F460 in most cases).
- Endstops: Verify that the endstop pin assignments are correct since the Kobra 1 uses virtual endstops.
- Bed size: Double-check the bed dimensions to ensure they match the Kobra 1.
Verify Connection to the Printer: Once you’ve modified the configuration, you’ll want to ensure that Klipper can see the printer. SSH into the host (your Raspberry Pi or Linux computer) and run:
ls /dev/serial/by-id/*You should see an output similar to:
/dev/serial/by-id/usb-1a86_USB_Serial-if00-port0Include Additional Configurations: If you’re using a web interface like Fluidd, you’ll need to include the Fluidd configuration file in the printer.cfg. To do this, add the following line at the top of your config:
[include fluidd.cfg]Save and Restart: After modifying the printer.cfg, save the file in Fluidd, and restart both the host and the printer.

Final Touches
There may be a warning about the MCU running at 168MHz instead of 200MHz, but this seems to be a glitch. The Kobra 1’s MCU runs at 200MHz, and so far I have done 2 successful prints with no issues, so you can safely ignore this.
Once everything is set, you should have Klipper fully running on your Anycubic Kobra 1!
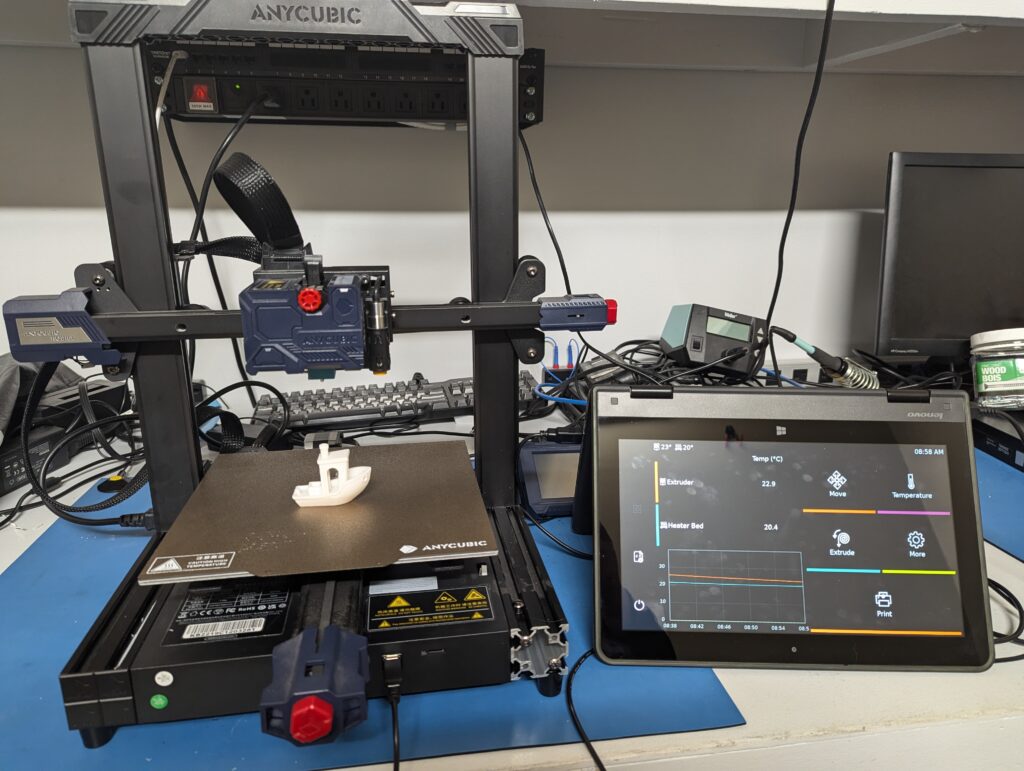
Here is the full Anycubic Koba 1 configuration file that worked for me!
[include fluidd.cfg]

# This file contains a configuration for the Anycubic Kobra 1 printer,
# modified from a cfg file originally for a Koba Plus.
#
# For more information, please visit https://simplicitysolved.ca


[mcu]
serial: /dev/serial/by-id/usb-1a86_USB_Serial-if00-port0
restart_method: command

[printer]
kinematics: cartesian
max_velocity: 180
max_accel: 2500
max_z_velocity: 10
max_z_accel: 80
square_corner_velocity: 5

[stepper_x]
step_pin: PA5
dir_pin: PA4
enable_pin: !PC3
microsteps: 32
rotation_distance: 40
position_endstop: -34
position_min:-38
position_max: 229
homing_speed: 40
endstop_pin: tmc2209_stepper_x:virtual_endstop
homing_retract_dist: 0

[tmc2209 stepper_x]
uart_pin: PA15
#tx_pin: PA9
uart_address: 3
#select_pins: !PB4
diag_pin: PA6
driver_SGTHRS: 80
run_current: 0.9
stealthchop_threshold: 999999
interpolate: True

[stepper_y]
step_pin: PC4
dir_pin: PA7
enable_pin: !PC3
microsteps: 32
rotation_distance: 40
position_endstop: -4 #Needs adjustment, i have custom carriage
position_min:-4
position_max: 229
homing_speed: 40
endstop_pin: tmc2209_stepper_y:virtual_endstop
homing_retract_dist: 0

[tmc2209 stepper_y]
uart_pin: PA15
#tx_pin: PA9
#select_pins: !PB4
uart_address: 1
run_current: 0.6
diag_pin: ^PC5      # Set to MCU pin connected to TMC DIAG pin
driver_SGTHRS: 80 # 255 is most sensitive value, 0 is least sensitive
stealthchop_threshold: 999999

[probe]
pin: PB8
x_offset: 41
y_offset: 5
#z_offset: 1.810
samples: 6
samples_result: median
samples_tolerance: 0.05
samples_tolerance_retries: 5
sample_retract_dist: 0.5
speed:1
lift_speed:1


[stepper_z]
step_pin: PC7
dir_pin: !PC6
enable_pin: !PC3
microsteps: 256
rotation_distance: 4
endstop_pin: probe:z_virtual_endstop
#endstop_pin: PB8
#position_endstop: 1.35
position_min: -0.10
position_max: 230
homing_speed: 5
second_homing_speed:1
homing_retract_dist: 2.3

[tmc2209 stepper_z]
uart_pin: PA15
#tx_pin: PA9
#select_pins: !PB4
uart_address: 2
run_current: 0.6
diag_pin: ^PA8      # Set to MCU pin connected to TMC DIAG pin
driver_SGTHRS: 50  # 255 is most sensitive value, 0 is least sensitive
stealthchop_threshold: 999999

[extruder]
max_extrude_cross_section: 50.0
max_extrude_only_distance: 1500
step_pin: PC14
dir_pin: PC15
enable_pin: !PC3
microsteps: 64
rotation_distance: 8.204
nozzle_diameter: 0.400
filament_diameter: 1.750
heater_pin: PA1
sensor_type: EPCOS 100K B57560G104F
sensor_pin: PC1
pressure_advance: 0.042
min_temp: 0
min_extrude_temp: 190
max_temp: 250 #Stock is 250

#[firmware_retraction]
#retract_length: 0.5 #stock is more than 2
#retract_speed:20
#unretract_extra_length:0
#unretract_speed:20

[tmc2208 extruder]
uart_pin: PA15
run_current: 0.7
stealthchop_threshold: 999999

[heater_bed]
heater_pin: PA0
sensor_type: EPCOS 100K B57560G104F
sensor_pin: PC0
min_temp: 0
max_temp: 130

[safe_z_home]
home_xy_position: 70.5, 109.3 # Change coordinates to the center of your print bed
speed: 50
z_hop: 5               # Move up 5mm
z_hop_speed: 10

[bed_mesh]
speed: 100
horizontal_move_z: 10
mesh_min: 19, 19
mesh_max: 210, 210
probe_count: 6, 6
fade_start: 1
fade_end: 10
fade_target: 0
mesh_pps : 2, 2
algorithm: lagrange

[controller_fan controller_fan]
pin: PA14
fan_speed: 0.7

[heater_fan extruder_fan]
pin: PA13
heater_temp: 65.0

[fan]
pin: PB9

[pause_resume]

[display_status]

[gcode_macro PAUSE]
description: Pause the actual running print
rename_existing: PAUSE_BASE
# change this if you need more or less extrusion
variable_extrude: 1.0
gcode:
  ##### read E from pause macro #####
  {% set E = printer["gcode_macro PAUSE"].extrude|float %}
  ##### set park positon for x and y #####
  # default is your max posion from your printer.cfg
  {% set x_park = printer.toolhead.axis_maximum.x|float - 5.0 %}
  {% set y_park = printer.toolhead.axis_maximum.y|float - 5.0 %}
  ##### calculate save lift position #####
  {% set max_z = printer.toolhead.axis_maximum.z|float %}
  {% set act_z = printer.toolhead.position.z|float %}
  {% if act_z < (max_z - 2.0) %}
      {% set z_safe = 2.0 %}
  {% else %}
      {% set z_safe = max_z - act_z %}
  {% endif %}
  ##### end of definitions #####
  PAUSE_BASE
  G91
  {% if printer.extruder.can_extrude|lower == 'true' %}
    G1 E-{E} F2100
  {% else %}
    {action_respond_info("Extruder not hot enough")}
  {% endif %}
  {% if "xyz" in printer.toolhead.homed_axes %}
    G1 Z{z_safe} F900
    G90
    G1 X{x_park} Y{y_park} F6000
  {% else %}
    {action_respond_info("Printer not homed")}
  {% endif %}

[gcode_macro RESUME]
description: Resume the actual running print
rename_existing: RESUME_BASE
gcode:
  ##### read E from pause macro #####
  {% set E = printer["gcode_macro PAUSE"].extrude|float %}
  #### get VELOCITY parameter if specified ####
  {% if 'VELOCITY' in params|upper %}
    {% set get_params = ('VELOCITY=' + params.VELOCITY)  %}
  {%else %}
    {% set get_params = "" %}
  {% endif %}
  ##### end of definitions #####
  {% if printer.extruder.can_extrude|lower == 'true' %}
    G91
    G1 E{E} F2100
  {% else %}
    {action_respond_info("Extruder not hot enough")}
  {% endif %}
  RESUME_BASE {get_params}

[gcode_macro CANCEL_PRINT]
description: Cancel the actual running print
rename_existing: CANCEL_PRINT_BASE
gcode:
  TURN_OFF_HEATERS
  CANCEL_PRINT_BASE

#*# <---------------------- SAVE_CONFIG ---------------------->
#*# DO NOT EDIT THIS BLOCK OR BELOW. The contents are auto-generated.
#*#
#*# [extruder]
#*# control = pid
#*# pid_kp = 15.624
#*# pid_ki = 0.681
#*# pid_kd = 89.642
#*#
#*# [heater_bed]
#*# control = pid
#*# pid_kp = 56.027
#*# pid_ki = 0.873
#*# pid_kd = 899.236
#*#
#*# [probe]
#*# z_offset = 1.500
#*#
#*# [bed_mesh default]
#*# version = 1
#*# points =
#*# 	  0.731133, 0.597266, 0.453672, 0.312578, 0.194922, 0.074258
#*# 	  0.619219, 0.501289, 0.365703, 0.240781, 0.134258, 0.003945
#*# 	  0.377773, 0.252891, 0.119570, -0.008320, -0.112656, -0.223594
#*# 	  0.267109, 0.148594, 0.024336, -0.088281, -0.181289, -0.300547
#*# 	  0.085938, -0.030547, -0.145000, -0.246992, -0.324922, -0.426055
#*# 	  0.020586, -0.092539, -0.208711, -0.305859, -0.384805, -0.489414
#*# x_count = 6
#*# y_count = 6
#*# mesh_x_pps = 2
#*# mesh_y_pps = 2
#*# algo = lagrange
#*# tension = 0.2
#*# min_x = 19.0
#*# max_x = 210.0
#*# min_y = 19.0
#*# max_y = 210.0
Hello, is it possible to share your printer.cfg file for Kobra 1? I have completed everything in your guide but my x-axis virtual endstop is not working and I cannot home.
Sure thing! I have added it to the bottom of the post!