The Sonoff S31 is already a solid choice for anyone looking to automate their home. It’s compact, energy-monitoring capable, and generally plays well with most smart home platforms. But there’s a catch. It ships with eWeLink firmware, which means dealing with cloud dependency and limited local control. If you prefer to keep things snappy, private, and fully customizable, flashing ESPHome is the way to go.
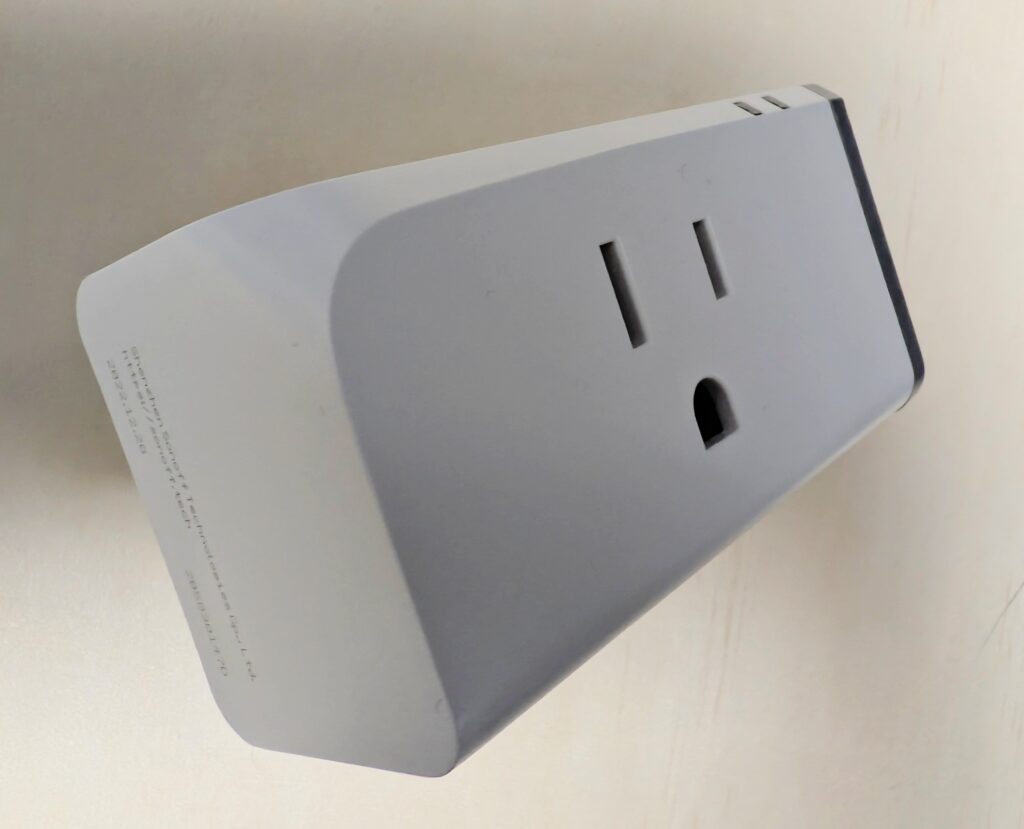
Why go through the trouble? ESPHome turns the S31 into a fully local, secure, and flexible device that integrates seamlessly with Home Assistant. No cloud, no lag, just pure home automation bliss. Plus, if you’re the tinkering type, ESPHome lets you fine-tune everything, from power monitoring thresholds to automation triggers local on the device without any need for internet connectivity.
Sonoff S31 Specifications
- Chipset: ESP8266 (ESP8285 variant)
- Wi-Fi: 2.4GHz 802.11 b/g/n
- Max Load: 15A
- Voltage: 120V AC
- Power Monitoring: Yes (CSE7766 energy sensor)
- Firmware Compatibility: eWeLink (Stock), ESPHome, Tasmota
- OTA Updates: Yes (via ESPHome or Tasmota)
What You’ll Need
- Sonoff S31 Smart Plug
- USB to TTL Serial Adapter with 3.3v
- Jumper Wires with Dupont Connectors and Headers
- Plastic Pry Tools or Guitar Picks (Optional, Avoids damaging the casing)
- Soldering Iron (Optional but Recommended)
- ESPHome Server (Mine is installed via Home Assistant)
- ESPHome Web or ESPHome-Flasher Software
Opening the Sonoff S31
If you’ve ever cracked open a smart plug before, you know how frustrating some designs can be… glued seams, hidden screws, plastic clips that refuse to budge. Thankfully, Sonoff actually made this one surprisingly DIY-friendly. It’s almost as if they knew people like us would want to tinker with it.
The first step is removing the grey button cover on the right side. It’s held in place by plastic clips, and in most cases, you can just pull it off by hand. If it doesn’t come off easily, a plastic pry tool, or guitar pick can help get some leverage without damaging the plastic. A thin screwdriver can work too, but it’s easy to gouge the plastic if you’re not careful.
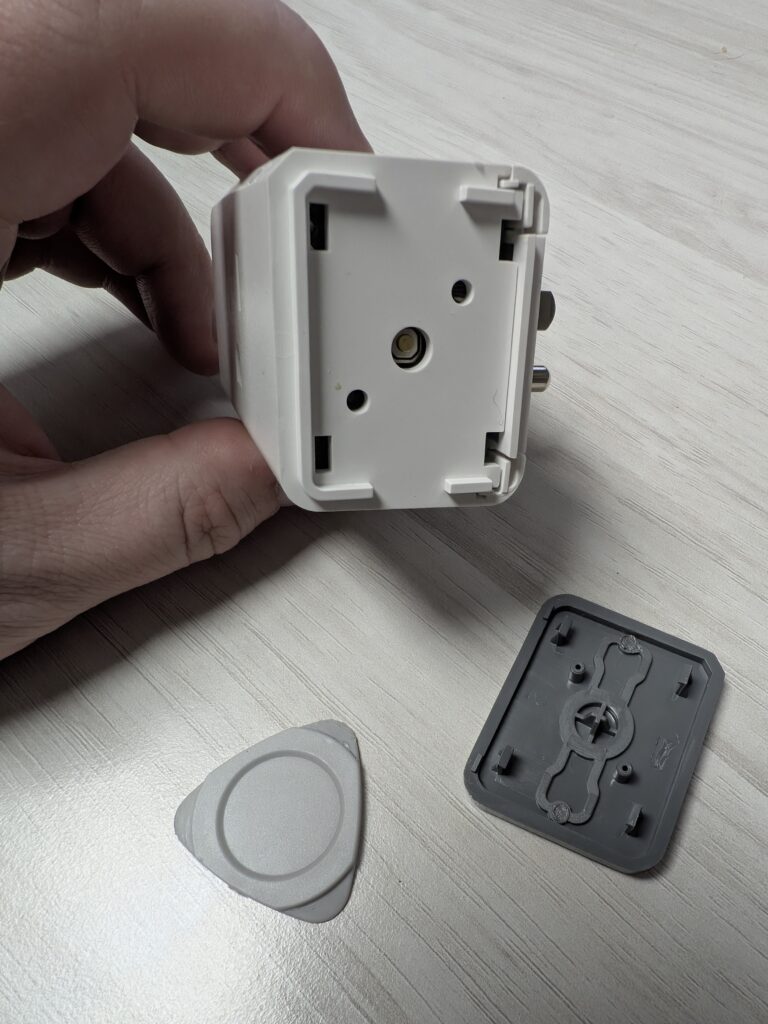
With the button off, the real magic happens. The casing corners actually slide apart from the main body.
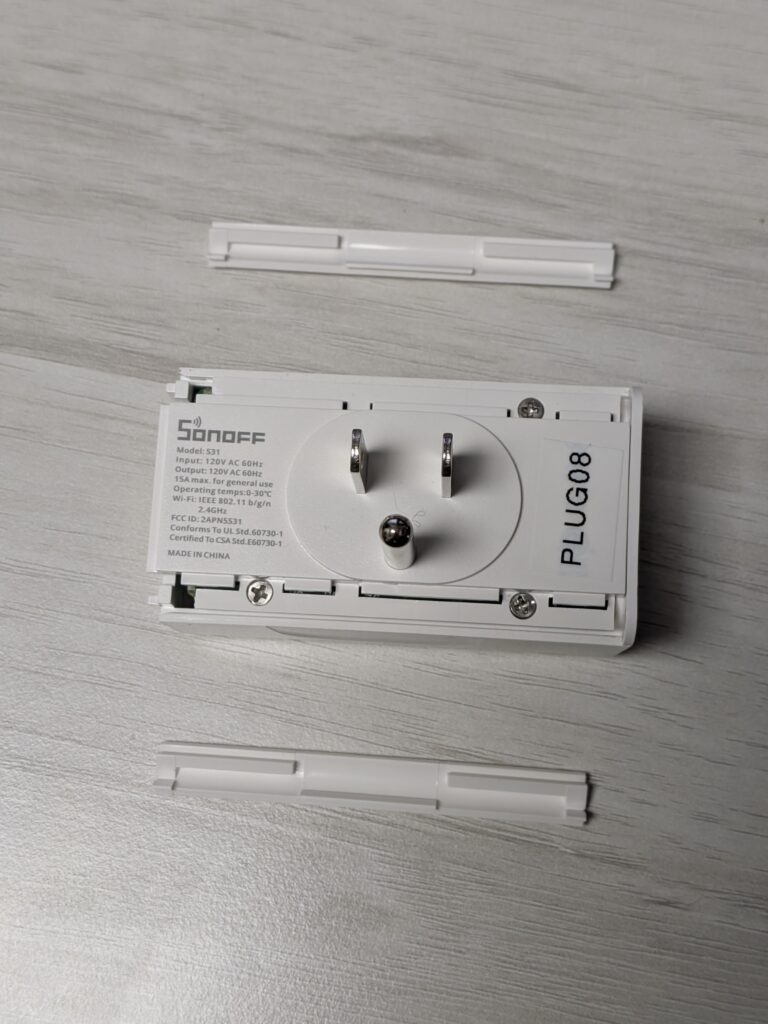
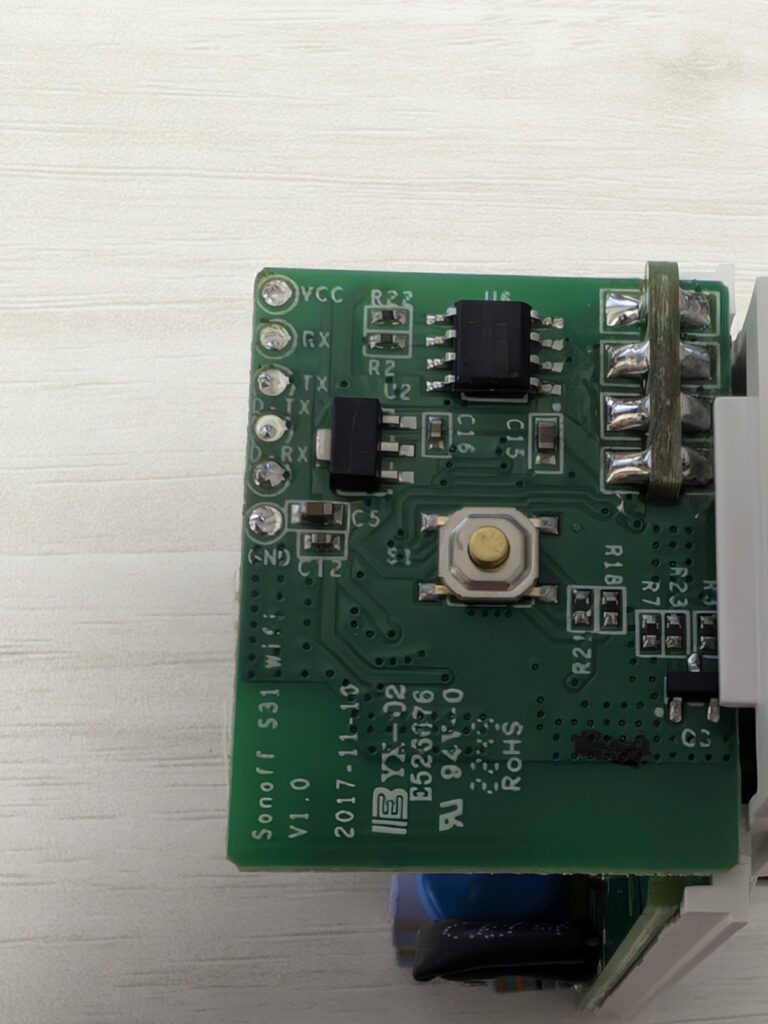
Now with the corners removed, you’ll see three screws securing the casing. Once those are out, the top casing lifts away, fully exposing the circuit board inside. At this point, you have direct access to everything you need to flash ESPHome.
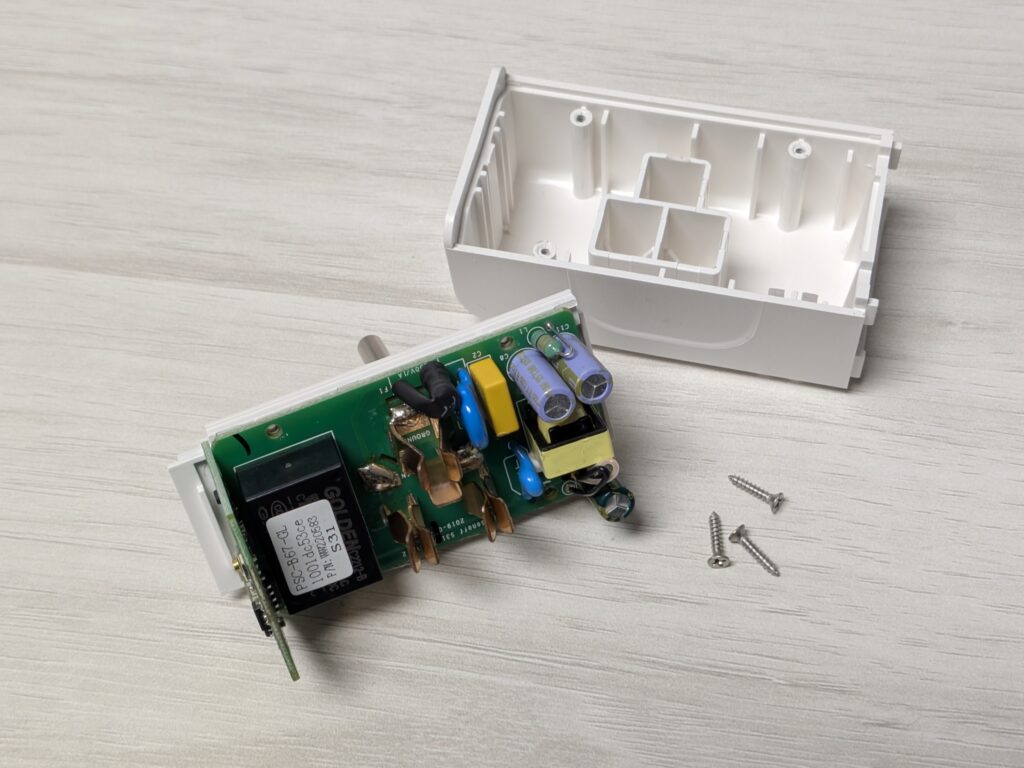
At this stage, the ESP8266-based board is visible, with its GPIO pins exposed. These are what we’ll use for flashing: GND, TX, RX, and VCC.
Important Safety Warning
NEVER plug the Sonoff S31 into mains power while connected to a TTL adapter! Doing so can cause serious damage to the device, your TTL adapter, your computer or even YOU! Always flash the device while it is completely disconnected from AC power.
Additionally, be mindful that the Sonoff S31 has live and neutral wiring running very close to the PCB components. If working on it while powered (which you do not need to do as part of this guide), extreme caution is needed to avoid electrical shock hazards.
Connecting the Serial Adapter
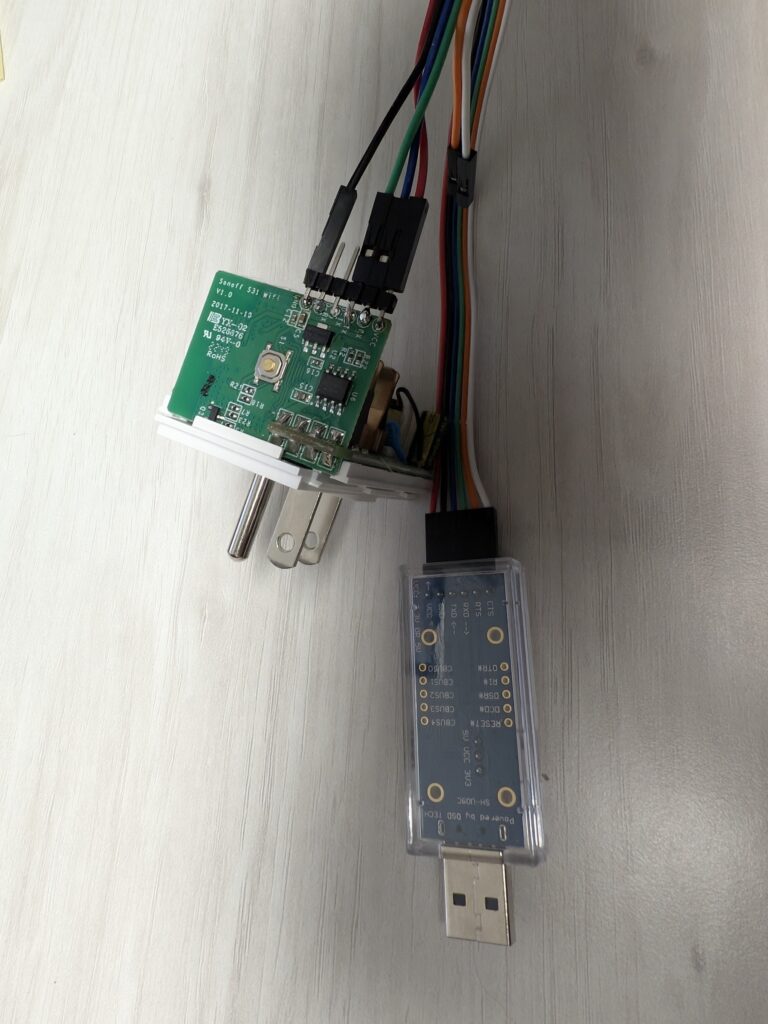
The USB to TTL adapter is the bridge between your computer and the Sonoff S31. I did this by soldering a header directly onto the ESP8266 and connecting Dupont cables. Is it pretty, or ideal? Not at all… but it sure is functional! There are various different ways you could connect them with IC Clips or direct soldering wires. Use your imagination here!
Connecting it properly is important, so double-check each wire:
- GND → GND (black)
- VCC → 3.3V (DO NOT USE 5V!) (red)
- TX → RX (green)
- RX → TX (blue)
To enter flashing mode, hold down the GPIO0 (button) while connecting the VCC pin. This forces the ESP8266 into programming mode. If your adapter has a 3.3V/5V jumper, ensure it is set to 3.3V before proceeding.
Flashing ESPHome
With the hardware set up, it’s time to flash ESPHome. There are two common methods:
- Using Home Assistant’s ESPHome Add-on (Recommended if you already use Home Assistant)
- Using ESPHome Web (ESPHome Web) – A browser-based method that works without installing extra software.
If using ESPHome-Flasher, select the correct serial port and load your ESPHome firmware file.

If you don’t have an ESPHome config yet, a very basic YAML file for the S31 would look like this:
esphome:
  name: sonoff-s31
  platform: ESP8266
  board: esp8285

wifi:
  ssid: "YOUR_WIFI_SSID"
  password: "YOUR_WIFI_PASSWORD"
  fast_connect: true

sensor:
  - platform: cse7766
    current:
      name: "Sonoff S31 Current"
    voltage:
      name: "Sonoff S31 Voltage"
    power:
      name: "Sonoff S31 Power"

switch:
  - platform: gpio
    name: "Sonoff S31 Relay"
    pin: GPIO12

binary_sensor:
  - platform: gpio
    name: "Sonoff S31 Button"
    pin:
      number: GPIO0
      mode: INPUT_PULLUP
      inverted: true
    on_press:
      - switch.toggle: relay

status_led:
  pin:
    number: GPIO13
    inverted: true
If you get stuck on “Connecting”, try swapping your RX and TX cables. Sometimes that gets me! If you have confirmed your RX and TX cables are correct, you still cant get connection, and you’re using solder like me, make sure you got enough solder to touch the pads!

After flashing, unplug the USB adapter, reassemble the plug, and power it on. It should now appear in Home Assistant under ESPHome.

Why It’s Worth It
With ESPHome, the Sonoff S31 gains full local control, making it faster and more reliable. No more relying on cloud servers or dealing with manufacturer limitations. The real-time power monitoring allows for automations based on actual energy usage, like turning off devices when idle or alerting you to unexpected power draws.
The best part? ESPHome supports over-the-air (OTA) updates, meaning after this initial setup, future updates and tweaks can be done without opening the device again.
If you’re serious about local smart home control, this is one of the most worthwhile modifications you can do. ESPHome isn’t just an alternative firmware, it’s the key to taking full ownership of your smart devices.

One comment on “Unlocking the True Power of the Sonoff S31 with ESPHome”