Proxmox Virtual Environment (PVE) is an incredibly powerful open-source platform for virtualization, offering robust features without requiring a paid subscription. However, unless you purchase a Proxmox support license, you’ll be greeted by a pop-up message every time you log into the web UI:
“You do not have a valid subscription for this server.”
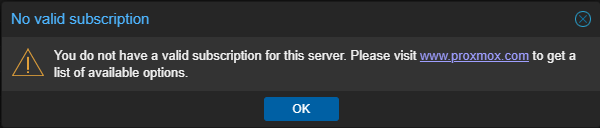
While Proxmox remains fully functional without a subscription, this recurring message can be distracting, especially for homelab users managing multiple servers. Fortunately, it’s possible to remove this message through a simple modification. Let’s explore the manual process while ensuring Proxmox 8.3+ continues running smoothly.
Understanding the Subscription System
Proxmox provides both free and paid versions of its software. The free version includes all features but lacks access to the enterprise repository, which offers more thoroughly tested updates. The warning message does not impact functionality, but Proxmox displays it to encourage users to support development through a subscription.
If you use Proxmox in a business setting and rely on official support, subscribing is a good investment. However, if you’re running Proxmox in a homelab or a non-critical environment, you might prefer to remove the message without purchasing a license.
Removing the Proxmox No Subscription Message
Start by accessing the Proxmox shell. You can do this through the Web UI by selecting your node under “Datacenter” and clicking the “>_ Shell” button, or by connecting via SSH if you prefer a remote terminal.
The subscription message is embedded in the proxmox-widget-toolkit JavaScript file. Before making any changes, it’s always a good idea to create a backup in case you need to restore it later. Navigate to the directory containing the JavaScript file:
cd /usr/share/javascript/proxmox-widget-toolkitMake a backup of the original file:
cp proxmoxlib.js proxmoxlib.js.backupNow, open the file in a text editor:
nano proxmoxlib.jsLocate the following line by using Ctrl+W in nano to search:
if (res === null || res === undefined || !res || res
    .data.status.toLowerCase() !== 'active') {
Modify this line so it always evaluates as false:
if (false) {Save the changes by pressing Ctrl+X, then Y, and hitting Enter.
For the changes to take effect, restart the Proxmox proxy service:
systemctl restart pveproxy.serviceAfter logging out, clear your browser cache or restart the browser before logging back in. The subscription message should no longer appear.
Removing the Enterprise Repository Warning
When running apt-get update, Proxmox will still display a warning about missing subscription repositories. Since homelab users typically use the No-Subscription Repository, you can disable the enterprise repository to remove this warning.
Edit the Proxmox sources list:
nano /etc/apt/sources.list.d/pve-enterprise.listComment out the existing enterprise repository by adding a # at the beginning of the line:
# deb https://enterprise.proxmox.com/debian/pve bookworm pve-enterpriseSave and exit (Ctrl+X, then Y, and Enter).
Then, add the No-Subscription Repository if it’s not already present:
echo "deb http://download.proxmox.com/debian/pve bookworm pve-no-subscription" > /etc/apt/sources.list.d/pve-no-subscription.listFinally, update the package lists:
apt-get updateThe update process should now complete without warnings about missing subscriptions.
Removing the Ceph Enterprise Repository
Proxmox also includes an enterprise repository for Ceph, which may cause an unauthorized error when running apt-get update. Ceph is a distributed storage system designed for large-scale deployments, mainly used for clustering and shared storage. It requires at least three nodes to function properly. If you are running a single-node Proxmox setup or using local storage like ZFS or LVM, you do not need Ceph and can safely remove this repository.
To disable the Ceph enterprise repository, open its repository list:
nano /etc/apt/sources.list.d/ceph.listComment out the enterprise Ceph repository by adding a # at the beginning of the line:
# deb https://enterprise.proxmox.com/debian/ceph-quincy bookworm InReleaseSave and exit (Ctrl+X, then Y, and Enter).
Now, update the package lists again:
apt-get updateThis should prevent the unauthorized error from appearing.
Restoring Proxmox to Default Settings
If you decide to purchase a Proxmox subscription and want to revert all changes, restoring the default settings is straightforward.
First, restore the original Proxmox UI message by moving the backup file back into place:
mv /usr/share/javascript/proxmox-widget-toolkit/proxmoxlib.js.backup /usr/share/javascript/proxmox-widget-toolkit/proxmoxlib.js
systemctl restart pveproxy.service
Next, re-enable the Proxmox enterprise repository by opening the sources list:
nano /etc/apt/sources.list.d/pve-enterprise.listRemove the # at the beginning of the line to restore it.
Similarly, if you need Ceph and previously disabled its repository, open the Ceph repository list:
nano /etc/apt/sources.list.d/ceph.listRemove the # from the beginning of the Ceph repository line to restore it.
Once all repositories are restored, refresh the package lists:
apt-get updateAt this point, your Proxmox installation is back to its original configuration, fully prepared for official support and enterprise updates.
Removing the Proxmox subscription message helps create a cleaner interface, but remember that subscribing supports the developers and provides access to more stable updates. If you use Proxmox in a mission-critical environment, consider purchasing a subscription. For homelab users, this workaround keeps things distraction-free while preserving full functionality.