When my mom’s oven decided to transform a perfectly good apple crisp into charcoal on Easter, I knew it was time to play a bit of detective work. The broil element had a bit of a mind of its own, staying on until a safety error with the message “BROIL K3 BAD-REPLACE CONTROL” thankfully intervened.
The first thing I did, after unplugging the oven for safety (always a smart move when dealing with high voltage), was to pop open the oven back. Inside, I found the control board model W10157242.F, a part that seems common across various manufacturers. A quick search for a replacement revealed prices ranging from $250 for a used board to a staggering $1000. With those figures, and risking having the same issue with a used board anyway, one might as well consider just getting a new oven. Yet, there were repair companies offering to fix the board for around $200 plus shipping. This suggested the board could be mended, which sparked my DIY spirit.
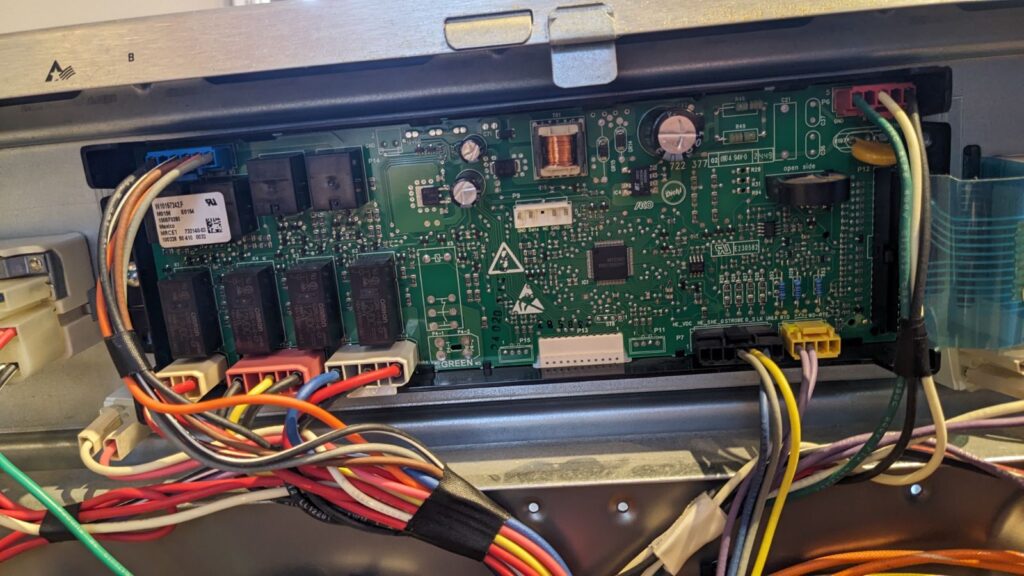
Removing the board was straightforward—disconnect the connectors and unscrew the two screws holding the plastic housing. Next, I slid off the white connector that attaches the screen from the PCB. With a bit of finesse around the four release tabs, I freed the PCB from its plastic housing, revealing the board in all its glory.

The likely offender, indicated by the error code, was the K3 relay—an Omron G2RL-1-E-CF 12VDC, controlling the broil and convect elements. Familiar with its type, a SPDT relay, I knew it had specific pins for triggering and switching states between open and closed.

After some careful work (and a fair share of muttered curses), I managed to remove the malfunctioning K3 relay. Surprisingly, it tested fine off the board. My theory? Either the heat from the soldering might have nudged the stuck armature back into proper behavior, or part of the armature damaged. Yet, a side-by-side comparison with a new relay revealed a noticeable difference—the old one sounded rattly, while the new one clicked satisfyingly.
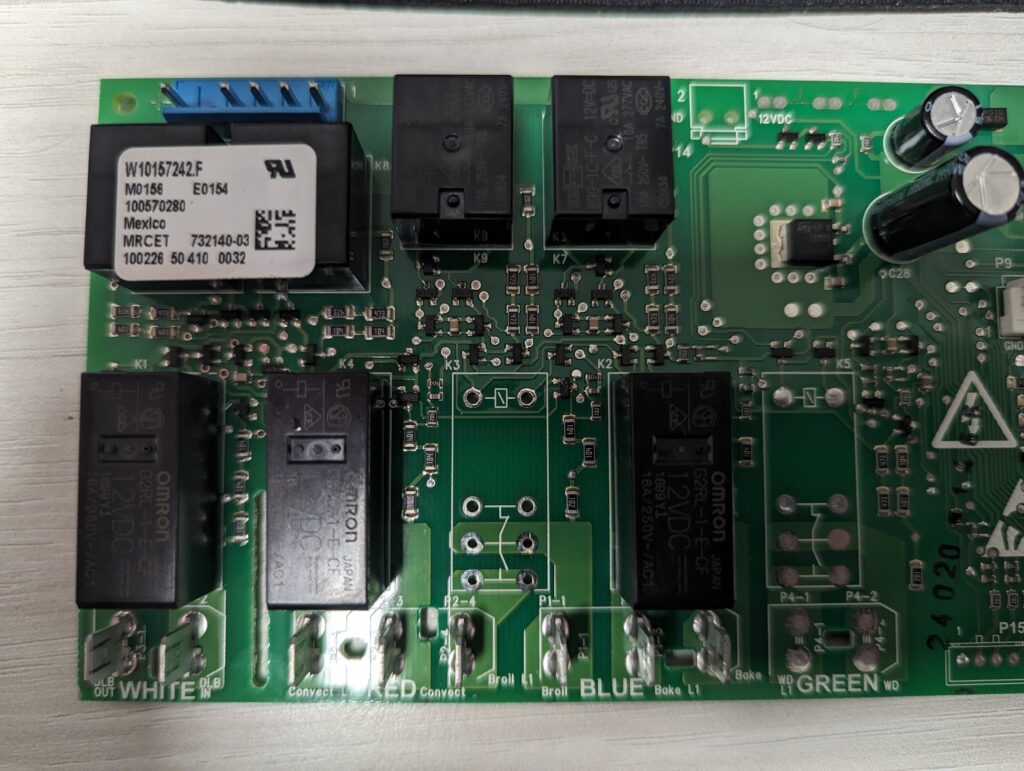
Replacing it involved simply soldering on a new relay from Digikey for about $6 CAD . After cleaning up with some isopropyl alcohol, the board was ready to be reinstalled in the oven.
And just like that, the oven was back to normal, baking rather than incinerating. This not only saved a hefty sum but also (hopefully) extended the oven’s life, and prevented an extra oven heading to the landfill.
Just wanted to say thanks for posting this. I had the same thing happen on my Whirlpool Gold oven with the same controller. In my case, the board was populated with obsolete Song Chuan 888HN-1CH-F-C relays, which match specs perfectly to the Omron yours had. It looks like Panasonic ALZ12F12 would also be a good substitute.