Ever had a USB drive that just wouldn’t cooperate? I’ve experienced this quite often, usually as a result of doing a DD image write, which often screws up the drive’s partitions.
Here’s a step-by-step guide on how I get these USB drives back in working order.
Symptoms of a Corrupted USB Drive
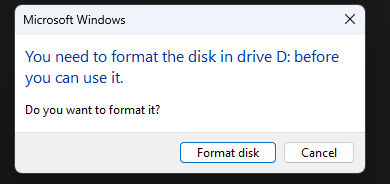
- Format Pop-Up: When you insert the drive, a pop-up appears asking you to format it. Attempting to format results in an error.
- RAW File System: Computer Management shows the drive with a RAW file system or partitions that cannot be formatted.
- Computer Sluggishness: The computer becomes sluggish while the USB drive is plugged in.


Using Diskpart to Reset the Drive
Step 1: Run CMD as Administrator
- Press
Windows + Xand select “Command Prompt (Admin)” or “Windows PowerShell (Admin)”. - Type
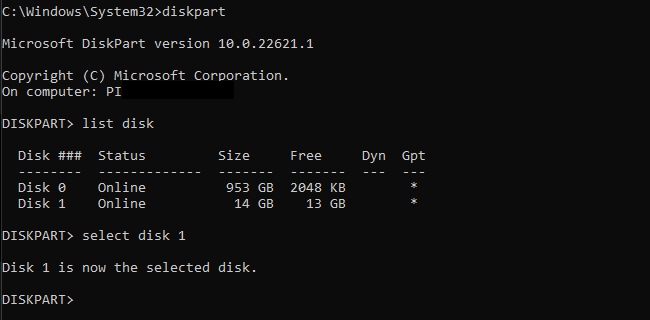
diskpartand press Enter to open the Diskpart utility.
Step 2: Identify the USB Drive
- Type
list diskand press Enter. This will display a list of all the disks connected to your computer. - Identify your USB drive by its size and note its disk number (e.g., Disk 1).
Step 3: Select the USB Drive
- Type
select disk X(replace X with your USB drive’s disk number) and press Enter.

Step 4: List Partitions
- Type
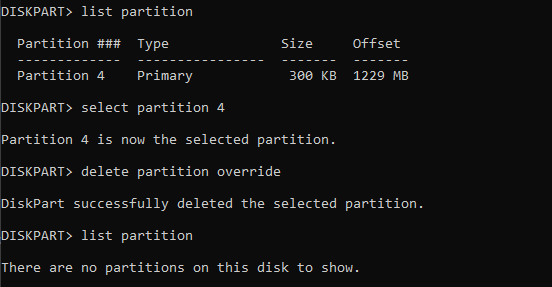
list partitionand press Enter to display all partitions on the selected disk.
Step 5: Delete Partitions
- Type
select partition N(replace N with the partition number) and press Enter. - Type
delete partition overrideand press Enter. Repeat this process for each partition until there are no partitions left on the USB drive.

Step 6: Create a Primary Partition
- Type
create partition primaryand press Enter.
Step 7: Exit Diskpart
- Type
exitand press Enter to close Diskpart.
Step 8: Reconnect and Format the USB Drive
- Unplug the USB drive from your computer and plug it back in.
- You may need to format the drive or manually assign a drive letter if it’s already formatted.
Final Result
You should now have a USB drive with a single partition utilizing the full drive space!
By following these steps, you can fix a USB drive that won’t cooperate due to corrupted partitions. This method helps reset the drive, allowing it to function properly again. If you encounter any issues or have additional questions, feel free to leave a comment!


Good walkthrough. You can also accomplish all of this through the disk management console in Windows 🙂
Under most circumstances, using the Disk Management console is ideal. However, for corrupt drives or those that have been directly imaged, the console can become unresponsive or just simply not allow you to work with the partitions. It requires a bit more in depth approach! Good tip though!