It’s been a while since my last post… life has been busy with renovations, and I’ve been knee-deep in drywall dust and paint instead of tech projects. But I finally decided to take a break from home improvement and sit down to tinker with something I’ve been meaning to explore for a while: the Pwnagotchi.
Setting up a Pwnagotchi is a fun and rewarding project, but let’s be clear upfront – this is a learning tool, not something to be used maliciously. If you’re here to do anything questionable, this isn’t the guide for you. But if you’re looking to explore Wi-Fi security, network protocols, and AI-driven automation ethically, let’s get started.
What is a Pwnagotchi?
Think of it as a pocket-sized AI that learns to optimize its environment for capturing Wi-Fi handshakes. It’s built on a Raspberry Pi Zero W, runs on an e-paper display, and has a cute, tamagotchi-like personality. Yes, it even gets happy when it sniffs out new networks. But don’t let its charm fool you, this is a powerful security tool.
What You’ll Need
To keep things simple, let’s talk about the hardware setup first. The recommended build for a solid, stable Pwnagotchi includes:
- Raspberry Pi Zero W or Pi Zero W 2: This is the core of the Pwnagotchi. Make sure you’re using the right one.
- MicroSD Card (16GB or higher): Avoid no-name brands. Get a SanDisk, Kingston, or Samsung for reliability.
- Micro USB Cable: Must support data transfer, not just charging. Those cheap gas station cables? Avoid.
- E-Paper Display: The Waveshare v3 is what we’re using. Looks cool, and saves battery.
- PiSugar 3: A self-contained power solution so no need for external power banks.
- MicroSD Card Reader: Because you need to flash the OS onto the card.
Depending on your hardware, you may need to do a bit of soldering if the headers aren’t pre-installed. If everything is already in place, assembly is straightforward, just connect the components, and you’re good to go!
Flashing the Image
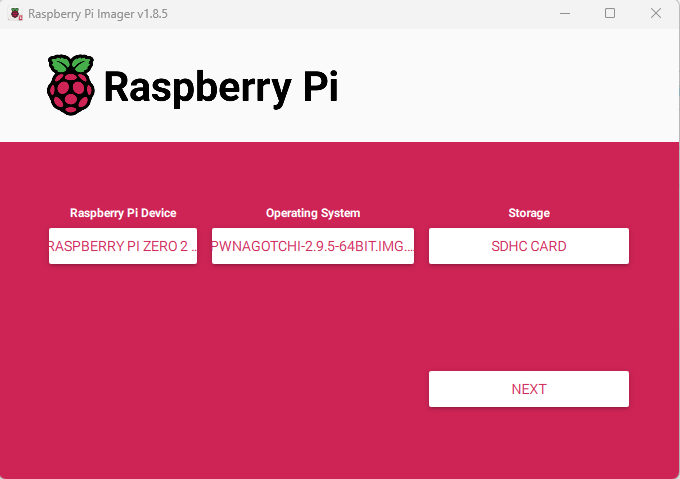
Alright, let’s get this thing running. First, download the Raspberry Pi Imager and install it. It’s as simple as clicking ‘Next’ a few times. Now, grab the latest Pwnagotchi image from jayofelony’s GitHub. We’re using version 2.9.5.2, which was the latest at the time I did my setup.
Open Raspberry Pi Imager, insert your MicroSD card, and select:
- OS: Use ‘Custom Image’ and select the Pwnagotchi image file you just downloaded.
- Storage: Select your MicroSD card.
Click ‘Next’, read the warning that its going to wipe your card, hit Write and let it do its thing. This takes about five minutes, depending on the speed of your SD card.
First Boot & Common Issues
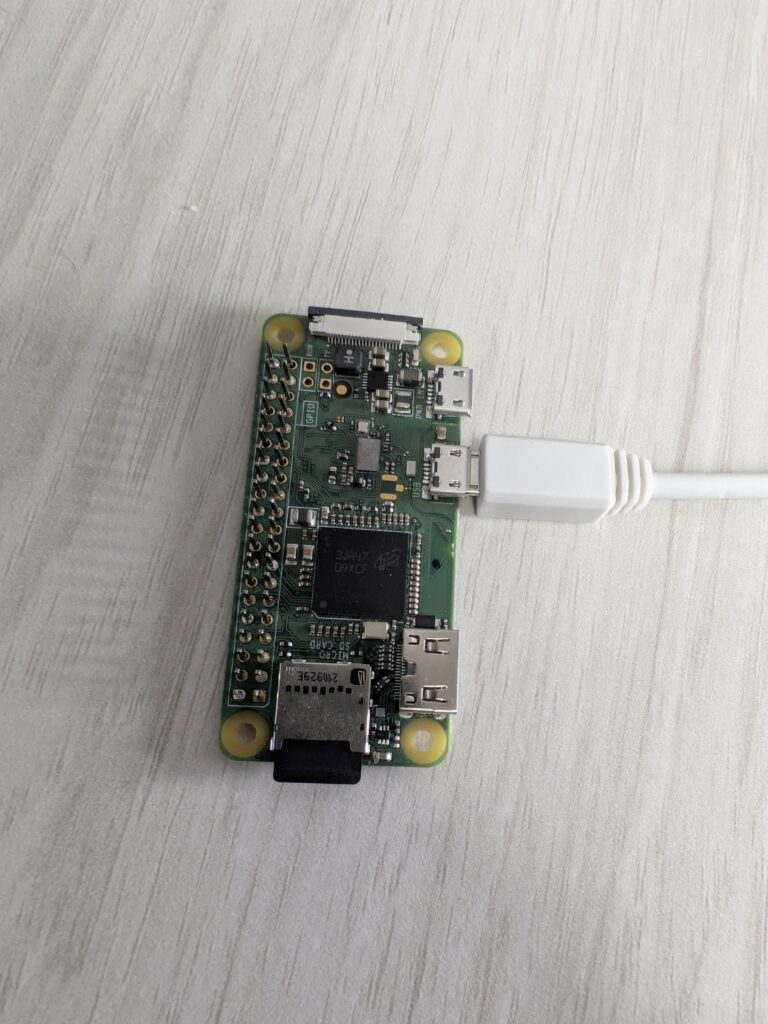
Once it’s written, eject the card and put it into your Pi. Plug a data-enabled Micro USB cable into the DATA port and connect it to your PC. If your Pi’s LED starts blinking in a seven-flash sequence, that means the Pi can’t find the kernel. Most likely? Your SD card is trash like my no-name one was. Swap it for a name-brand one, and you’ll save yourself a headache.
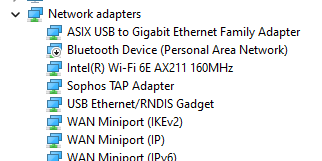
Setting Up Network Access
Before SSH’ing into your Pwnagotchi, Windows needs to recognize it as a network device. Open Device Manager and look for either:
- USB Ethernet / RNDIS Gadget (You’re good to go!)
- Unknown Device (You need the RNDIS driver.)
If it’s unknown, download the RNDIS driver, install it, and then head to Network Adapters in Windows.
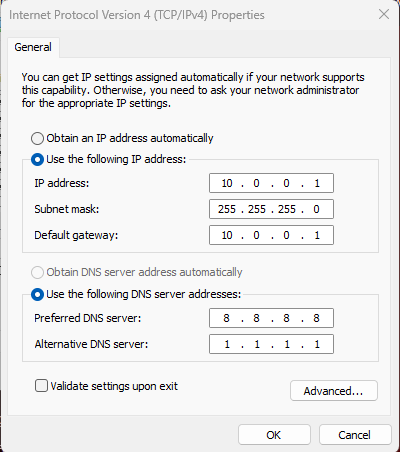
Find the RNDIS Ethernet adapter, right-click Properties, and configure Internet Protocol Version 4 (TCP/IPv4):
- IP Address: 10.0.0.1
- Subnet Mask: 255.255.255.0
- DNS Server: 8.8.8.8, 1.1.1.1
Now, enable Internet Sharing:
- Right-click your primary network adapter.
- Go to Properties > Sharing.
- Enable “Allow other network users to connect” and select the RNDIS adapter.
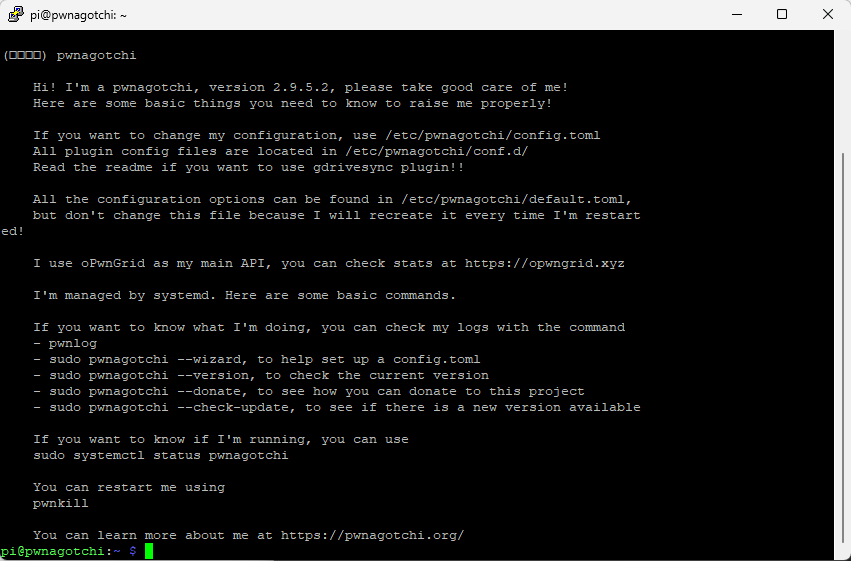
SSH Into Your Pwnagotchi
Next, install PuTTY and open it. Connect using:
- Host:
pi@10.0.0.2 - Port: 22
Default login credentials:
- Username: pi
- Password: raspberry
Configuring Pwnagotchi
Time to give your Pwnagotchi some personality. Run:
sudo pwnagotchi --wizardThis walks you through naming your Pwnagotchi and setting up preferences. Since we’re using PiSugar 3, we need to set that up next:
wget https://cdn.pisugar.com/release/pisugar-power-manager.sh
bash pisugar-power-manager.sh -c release
Once that’s done, reboot your Pwnagotchi:
pwnkillIf all goes well, your e-paper display should light up, showing that your Pwnagotchi is awake! No screen? No problem. You can still access it via the web interface:
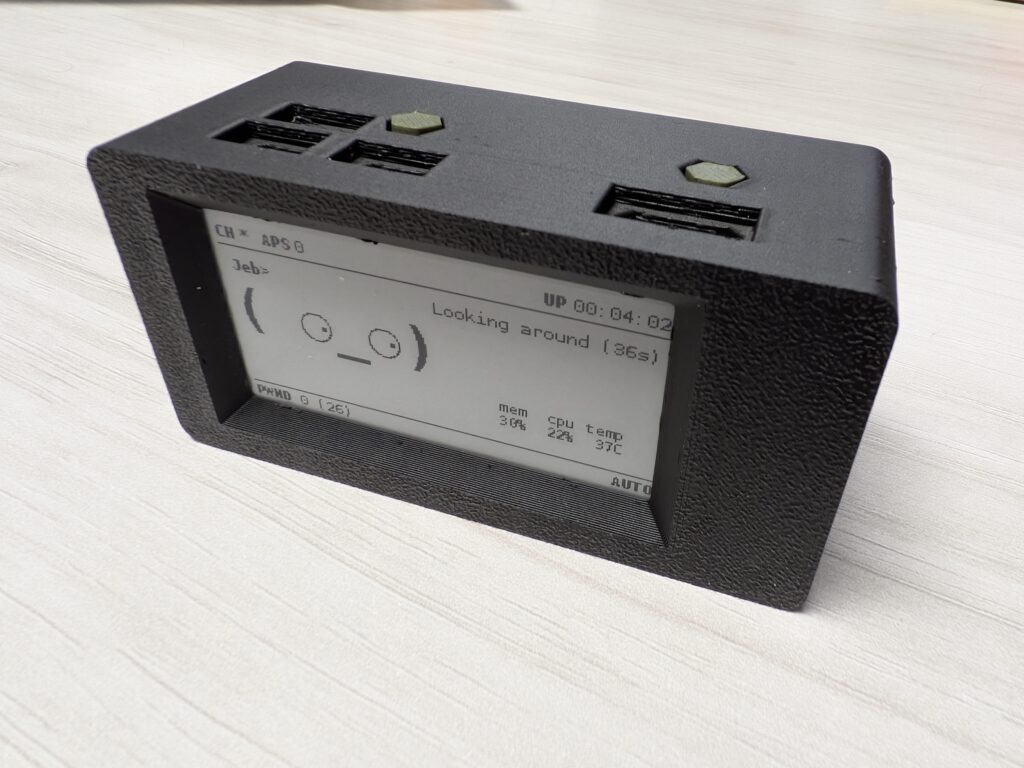
http://10.0.0.2:8080To give my setup an extra wow factor and make it even more “tacti-cool,” I 3D printed a custom enclosure to house the entire build. Not only does it keep everything neatly contained, but it also adds a sleek, professional touch that makes the Pwnagotchi feel like a high-end piece of gear.
So now you have a fully operational Pwnagotchi. What’s next? Train it, tweak it, and let it explore the digital wilderness. Just remember – only use it on networks you own or have explicit permission to test.
This isn’t just a hacking gadget. It’s a tool to learn about security, network penetration testing, and AI-driven automation. Have fun, be responsible, and—most importantly—don’t get arrested.