Tired of dealing with a power-hungry server in your basement? Want to switch to Proxmox but keep your existing Hyper-V virtual machines? You’re not alone. Plenty of people have tried to make the transition, but let’s be honest – most guides out there leave you piecing together information from multiple sources. This guide lays out the process clearly, with every step you need to get your Hyper-V VMs up and running on Proxmox without pulling (much of) your hair out.
What You’ll Need
- A Proxmox server (like the Dell Micro we set up last week here)
- An existing Hyper-V setup with Windows VMs
- A way to transfer files between your Hyper-V machine and Proxmox (SMB share, SFTP, or external storage)
- VirtIO drivers for Windows VMs
- Some patience (the process works, but it requires a bit of manual effort)
Installing the VirtIO Drivers on Hyper-V
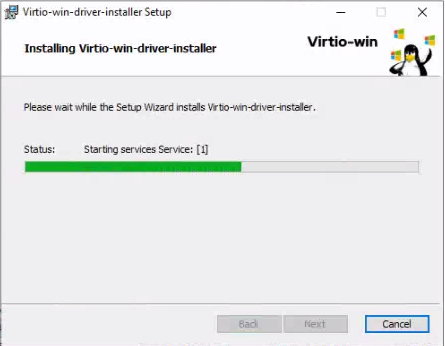
Before shutting down your Hyper-V VM, you need to install the VirtIO drivers. These drivers allow Windows to recognize the hardware in Proxmox properly, avoiding the dreaded INACCESSIBLE_BOOT_DEVICE blue screen.
- Download the VirtIO drivers from the official Proxmox repository.
- Mount the ISO in your Hyper-V VM.
- Open the Windows Explorer and navigate to the CD-ROM drive.
- Double-click on virtio-win-gt-x64
- Follow the on screen instructions.
- Install the necessary drivers and the guest agent from the
guest-agentdirectory. - Reboot VM
Once this is done, you’re ready to move your VM over to Proxmox.
Exporting the Hyper-V VM
Now that the drivers are in place, it’s time to get the VM out of Hyper-V.
- Shut down the VM completely.
- If you have snapshots or checkpoints, remove or merge them to simplify the process.
- Export the VM to a folder on your server by right clicking the VM and selecting Export. I sent mine to a new folder on the Desktop.
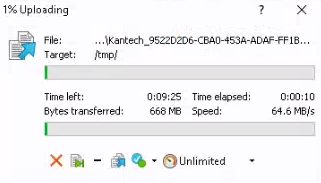
Now we need to get our export onto Proxmox. I prefered to manually copy the .vhdx file using SFTP to /tmp on your Proxmox server. This method is faster for large disks. You could also set up an SMB share and mount that in Proxmox, but I opted not to cover that here.
Using SFTP to Transfer the .vhdx File to Proxmox
If you want to transfer the exported VM file via SFTP, follow these steps:
- Install an SFTP client such as WinSCP or FileZilla on your Hyper-V machine.
- Open your SFTP client and connect to your Proxmox server using its IP address, root username, and password.
- Navigate to the exported
.vhdxfile on your Hyper-V machine. - On the Proxmox server side, navigate to the
/tmpdirectory. - Drag and drop the
.vhdxfile from your Hyper-V machine to the/tmpdirectory on Proxmox. - Wait for the transfer to complete. Large files can take some time depending on your network speed.
If you prefer command-line, you can use WinSCP CLI or scp from PowerShell:
scp C:\path\to\your\vm.vhdx root@<proxmox-ip>:/tmp/Replace C:\path\to\your\vm.vhdx with the actual location of your exported VM file and proxmox-ip with your Proxmox server’s IP address.
Creating a New VM in Proxmox
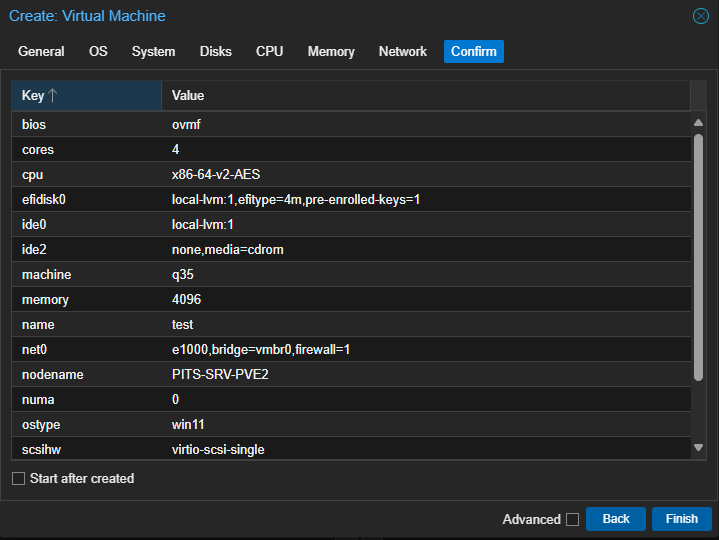
Create a new VM in Proxmox with the following settings:
- General: Give it a recognizable name.
- OS: Select Windows but do not attach any installation media.
- System: Set BIOS to OVMF (UEFI), select your EFI disk, and use
q35for the machine type. - Disks: Leave defaults but set disk size to 1GB (this will be replaced later).
- CPU, Memory, Network: Configure these as needed for your workload.
The key here is the q35 machine type, which prevents Proxmox from having boot issues when transitioning from Hyper-V.
Importing the Hyper-V Disk to Proxmox
Now, you need to attach your Hyper-V disk to the new VM. From the Proxmox console, run:
qm disk import <VM ID> /tmp/<filename>.vhdx local-lvm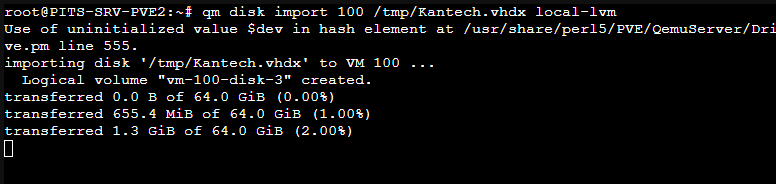
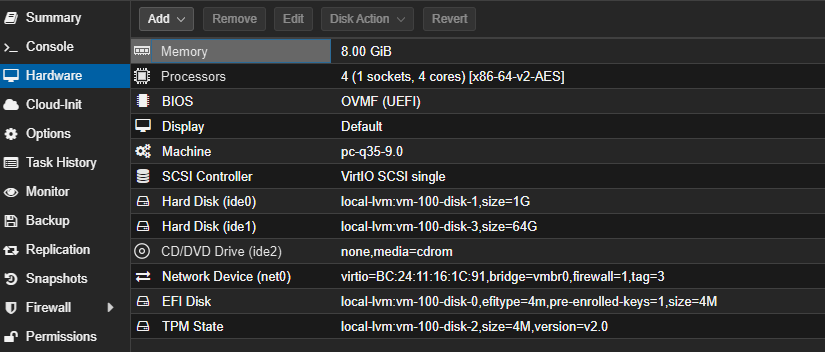
Attaching and Configuring the Disk
After importing the disk, you need to attach it properly:
- Go to VM > Hardware in Proxmox.
- Double-click Unused Disk 0 and attach it as SATA and click Add.
- Under Options > Boot Order, set the disk to boot first, and selected Enabled.
Now boot the VM.
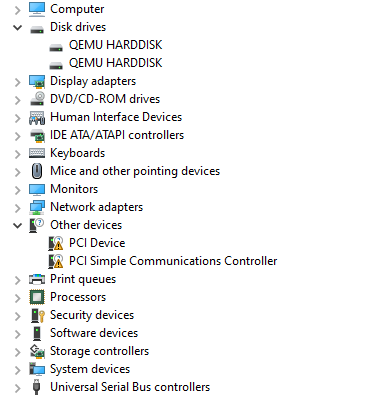
Fixing Boot Issues and Installing SCSI Drivers
The first boot will take the longest. Windows will have to do its thing, detecting hardware changes, and installing drivers. On my system, it rebooted about 3 times with different messages each time before finally bringing me to a login screen!
Once inside the VM:
- Open Device Manager.
- If you see missing drivers, reboot until they resolve or run Windows Update to try and force the drivers.
- If your PCI Simple Communications Controller is showing with an error, this is your QEMU agent. Manually install the driver by mounting the virtio ISO again in your VM, right click the PCI Simple Communications Device, and click Update Driver. Select Browse My Computer and select the driver from DRIVE:\vioserial\<OSVERSION>. You may also have to install the Guest Agent again as well (I had to!)
- Shut down the VM and detach the temporary 1GB drive if you didnt previously.
If done correctly, Windows should now boot without issues.
Wrapping Up
That’s it! Your Hyper-V VM should now be running smoothly on Proxmox. If you ran into boot issues, double-check that you used q35 for the machine.
For those wondering about stable VirtIO drivers, this official Proxmox link contains the best options for Windows Server 2019 and beyond. If you have Gen 1 Hyper-V VMs, you may need to switch from UEFI to a standard BIOS.
Have questions or hit a snag? Drop a comment below and let’s troubleshoot together.