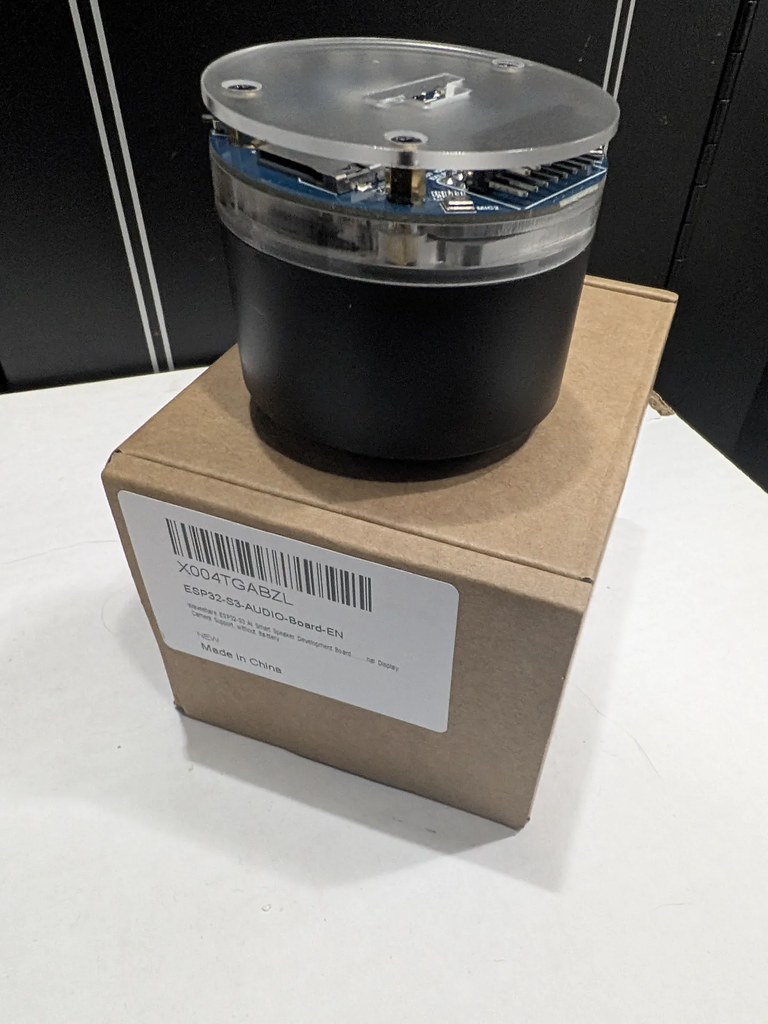
I’ve been wanting to ditch the Amazon Echos in our house for quite some time. Then on a late night Amazon shopping spree I decided to grab a Waveshare ESP32-S3 Audio board to see if it would be up to the task. The board showed up on a Tuesday. I plugged it into the laptop expecting to just get some flashy lights, and instead it started talking to me in Chinese, followed by my wife immediately saying “nope, I don’t need that listening to me” while she calmly sat on her phone scrolling Facebook failing to see the irony. I suspected that was just the stock demo firmware Waveshare ships on these, which turned out to be true. Mildly amusing for about ten seconds.
I bought it because I want voice control in the house that doesn’t route everything I say through Amazon’s or Google’s servers. Home Assistant supports local voice satellites now, and this board has the parts for it: two mics, an audio codec, a class-D amp, and an ESP32-S3 that’s fast enough to catch a wake word on the chip itself instead of streaming audio to a server 24/7.
Getting there is another matter. Waveshare supports this board with the Arduino IDE and ESP-IDF, and that’s it. ESPHome, which is what Home Assistant actually uses and has been progressively getting better with every update, isn’t on their list. The community has worked it out anyway, but the information is spread across multiple GitHub repos, a forum thread, and a machine-readable pinout file, mostly written by people logging their own progress rather than explaining anything.
So this is the version I wish I’d found. One walkthrough, start to finish, written for someone who hasn’t flashed a board before. Including the eight things that broke my build, most of which gave me nothing useful in the logs to explain why.
It works now. It hears me from across the room, the transcription is accurate, the LED ring changes colour as it listens and thinks and talks, and it turns my lights on and off without a single packet leaving the house.
Read trap 8 before your first test. Mine played its first successful reply at full output, a foot from my face, at midnight, in a quiet house. Set the volume before you test, not after.
What’s on the board
Half the trouble later comes straight out of this list, so it’s worth reading properly rather than skimming.
- ESP32-S3R8, 16MB flash, 8MB octal PSRAM
- ES7210 four channel audio ADC, wired to the microphones
- ES8311 codec, wired to the speaker
- NS4150B class-D amplifier
- Speaker, already built into the base of the unit
- TCA9555 I/O expander, which holds the buttons and the amplifier enable line
- 7x WS2812B RGB ring on GPIO38
- PCF85063 real time clock, with its own battery header
- USB-C for power and programming, plus a lithium battery header if you want it portable
The important structural detail: audio in and audio out are two separate chips sharing one I2S bus. Nearly every problem in this post traces back to that.
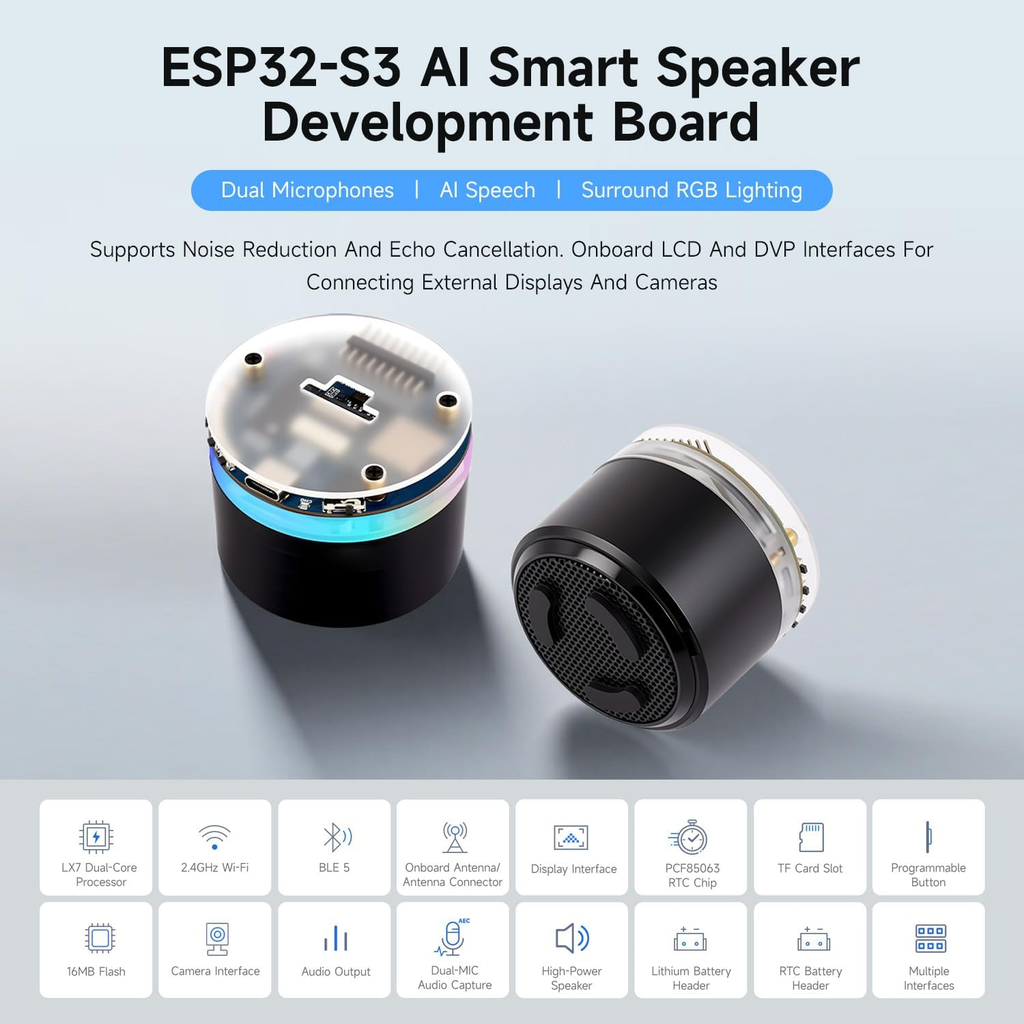
Waveshare’s own marketing shot is above, mostly because it shows the assembled unit better than anything I could photograph on a cluttered bench. The RGB ring doesn’t REALLY look like that, but it does allow a cool effect regardless.
The easier option, if you want it
If your goal is a working local voice satellite hassle free, buy the Home Assistant Voice Preview Edition. MSRP is $88 CAD, Apollo Automation is the reseller shipping it into Canada, and you’ll be done before lunch. I’m not being sarcastic, but that’s likely going to be the correct purchase for some people.
This board makes sense if you want to know how the pieces connect, or if you’re planning to build the guts into something of your own design later. That’s my reason. This is the first of likely multiple posts to come and the last one hopefully ends with my own build and enclosure.
Parts and software
On the bench you need the board, a computer, and a USB-C cable that carries data. That last one sounds patronising until it happens to you. Charge-only cables are the reason a large share of “my board won’t show up” threads exist.
The speaker is already soldered into the unit, so there’s nothing to source or wire. Mine was $36 on Amazon.ca and turned up in two days. It ships without a battery, which the listing is upfront about and which doesn’t matter unless you want it running untethered anyway.
On the software side you need Home Assistant with the ESPHome Device Builder add-on, plus Whisper for speech-to-text and Piper for text-to-speech. More on those further down, including the part where mine refused to start at all.
Nothing to solder.
ESPHome in one paragraph, for the uninitiated
You write a config file describing what the microcontroller should do, ESPHome compiles and flashes the firmware, and the device appears in Home Assistant on its own. No C, no Arduino sketches. The config is YAML and it’s where all your time goes, so make peace with editing it… repeatedly.
Fair warning on that: full compiles for this board run several minutes each. I did about a dozen in one night and it wears thin fast, so batch your changes where you can rather than testing one line at a time like I did.
Step 1: check for the COM port
Plug the board in before you install anything else.
Windows: Device Manager, under Ports (COM & LPT). A new COM port should appear when you plug it in and vanish when you pull it.
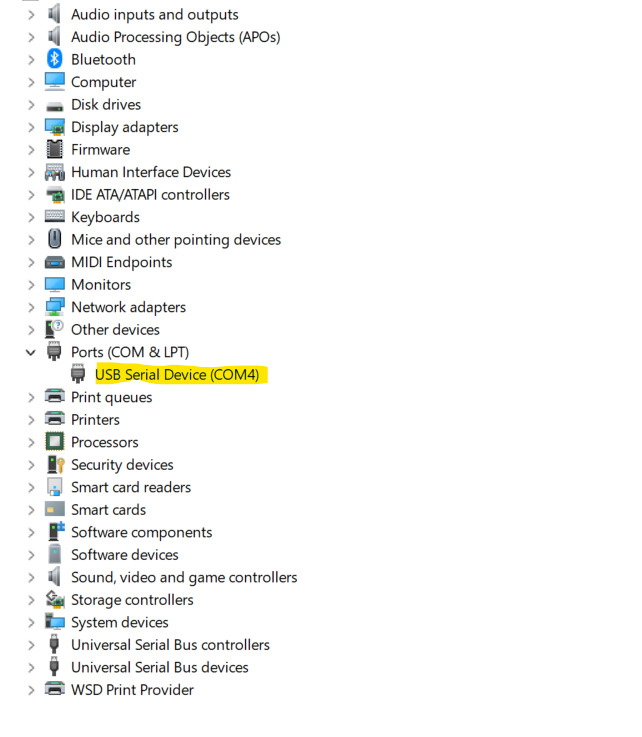
Nothing showing up usually means the cable, then the USB port, then a missing serial driver, in that order of likelihood. Don’t continue past this step until you’ve got a port. Every other step assumes it.
Step 2: flash something boring
The first config I flashed had no audio in it at all. No microphone, no speaker, no voice assistant, just WiFi.
That’s deliberate, and it’s the same habit that got me through reviving my bricked DJI Spark batteries. Prove the simple thing works before you introduce the complicated thing. When the audio config falls over later, and it will, you’ll already know the toolchain, cable, and board are fine, which narrows the search enormously.
In ESPHome click Create Device, click Advanced and select Empty Config. Name your device, click Finish, then throw away the generated config and use this:
substitutions:
  devicename: voice-satellite

esphome:
  name: voice-satellite
  friendly_name: Voice Satellite

esp32:
  board: esp32-s3-devkitc-1
  flash_size: 16MB
  framework:
    type: esp-idf

psram:
  mode: octal
  speed: 80MHz

logger:

api:

ota:
  - platform: esphome

wifi:
  ssid: !secret wifi_ssid
  password: !secret wifi_password
  reboot_timeout: 0s
  min_auth_mode: WPA2

  # Fallback hotspot in case the WiFi connection fails
  ap:
    ssid: "IoT ${devicename}"
    password: !secret iot_wifi_password
Two things in there deserve a note. !secret wifi_ssid tells ESPHome to pull the value from a separate secrets.yaml file it creates for you, which exists so your WiFi password doesn’t end up in a config you paste into a forum. And framework: esp-idf isn’t optional on this board, because the audio components later require it, so setting it now saves you a full recompile.
The substitutions: block matters if you use ${devicename} anywhere, like I do in the fallback hotspot name. Leave it out and validation fails with an error that doesn’t obviously point at the AP block.
Trap 1: PSRAM mode
psram: mode: octal is the line that costs people an evening.
ESP32-S3 has no default PSRAM mode, so ESPHome makes you declare it, and declaring it wrong means the chip never finds the PSRAM. What you get is PSRAM ID read error and a board stuck in a boot loop. This board is an S3R8, 8MB, which is octal mode. A 2MB S3 board would be quad. Since every tutorial online was written for whatever board that author happened to own, this is an extremely easy line to copy from the wrong source.
Step 3: flash it
First flash goes over USB. After that, over the air.
Hit Install, pick Plug into this computer, choose your COM port. If ESPHome is running inside Home Assistant on a different machine, use Manual download instead and flash the resulting binary with the ESPHome web flasher in your browser.
Then leave it alone. First builds compile from scratch and take a few minutes.
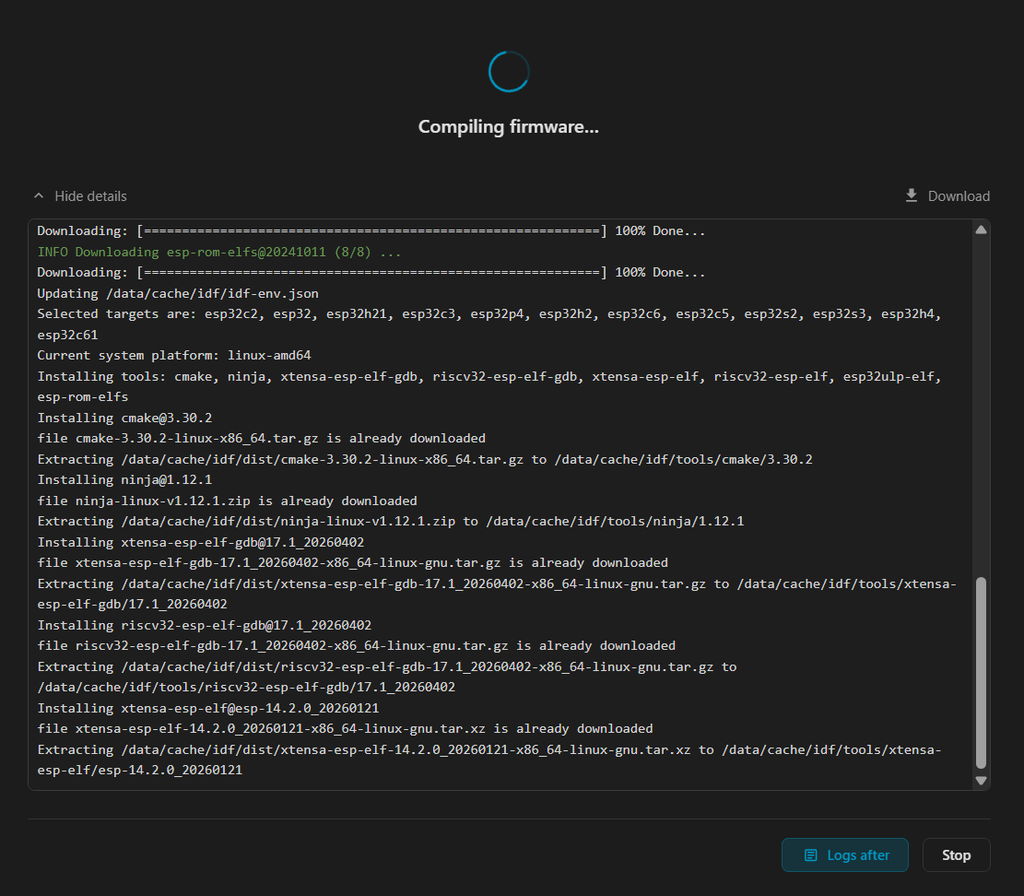
Once it’s done the Chinese demo firmware is gone for good and the board is running your firmware, on your network, with no account anywhere in the chain.
Trap 2: VLANs kill device discovery
My IoT gear sits on its own VLAN, separate from the one Home Assistant runs on. Home Assistant never found the board, and my first instinct was DNS cache, which was wrong.
ESPHome discovery uses mDNS, and mDNS is multicast, so it doesn’t cross subnets at all. No amount of waiting or cache clearing fixes that. My other ESPHome devices work fine because they happen to live on the same VLAN as Home Assistant, which made it look like something was broken with this specific board rather than with my network layout.
Add it manually instead. Settings, Devices & services, Add Integration, ESPHome, then type the board’s IP and port 6053. If your log says Noise encryption: NO it won’t ask you for a key.
Adding use_address: with the board’s IP to the WiFi block is also worth doing on a routed network, so OTA updates know where to find it.
Step 4: the audio side
The pin mapping below is the part I didn’t work out myself. Two people traced these independently and published, and they agree, which is about the best confirmation available for a board with no official support.
| Function | Pin |
|---|---|
| I2C SDA | GPIO11 |
| I2C SCL | GPIO10 |
| I2S MCLK | GPIO12 |
| I2S BCLK | GPIO13 |
| I2S LRCLK | GPIO14 |
| Microphone data in | GPIO15 |
| Speaker data out | GPIO16 |
| RGB LED ring | GPIO38 |
| Amplifier enable | TCA9555 pin 8 |
| Key 1 / 2 / 3 | TCA9555 pins 9 / 10 / 11 |
You don’t type any of this in yourself. It’s already baked into the config further down. I’m putting it here because when something misbehaves later, this table is what you’ll want to check against.
Trap 3: the microphone isn’t the ES8311
This one eats the most hours, because from the outside it looks like everything is working.
The ES8311 is a codec, and codecs can handle input as well as output, so the natural assumption is that configuring it gets you both directions. People do that, the microphone dutifully streams data, and then the wake word only half responds and speech-to-text comes back as gibberish. No errors or warnings. Just bad audio going into Whisper, which is much harder to chase down than an outright failure would be.
On this board the mics are wired to the ES7210, and you need an audio_adc block initialising it.
Trap 4: the amplifier starts switched off
The NS4150B amp isn’t controlled by the ESP32 directly. Its enable line sits on pin 8 of the TCA9555 expander.
Which means you can write a perfect speaker config, correct pins, correct codec, clean logs, zero errors, and hear absolutely nothing, because the amp is still asleep and nothing woke it. You handle it by declaring the TCA9555 as an expander and putting a GPIO switch on pin 8.
How you turn that switch on matters for a reason I get into in the fine tuning section, so use the version in the final config rather than just setting it to always on.
Trap 5: two buses, same clock pins
Audio in and audio out are separate chips, but BCLK and LRCLK are shared between them.
ESPHome will normally refuse to let two components claim one pin, which is sensible behaviour that happens to be wrong here. You override it with allow_other_uses: true on each shared pin, in both bus definitions. This one is the friendliest of the lot, since it fails at compile time and tells you exactly what it’s unhappy about.
The audio config
Everything below gets added to what you already flashed.
i2c:
  - id: bus_a
    sda: GPIO11
    scl: GPIO10
    scan: true
    frequency: 400kHz

# Holds the amp enable line and the buttons
tca9555:
  - id: expander
    address: 0x20
    i2c_id: bus_a

switch:
  - platform: gpio
    id: amp_enable
    name: "Speaker Amp"
    restore_mode: ALWAYS_OFF
    pin:
      tca9555: expander
      number: 8
      mode:
        output: true

# Two I2S buses sharing clock pins
i2s_audio:
  - id: i2s_out
    i2s_lrclk_pin:
      number: GPIO14
      allow_other_uses: true
    i2s_bclk_pin:
      number: GPIO13
      allow_other_uses: true
    i2s_mclk_pin:
      number: GPIO12
      allow_other_uses: true
  - id: i2s_in
    i2s_lrclk_pin:
      number: GPIO14
      allow_other_uses: true
    i2s_bclk_pin:
      number: GPIO13
      allow_other_uses: true
    i2s_mclk_pin:
      number: GPIO12
      allow_other_uses: true

audio_dac:
  - platform: es8311
    id: es8311_dac
    i2c_id: bus_a
    address: 0x18
    sample_rate: 16000
    bits_per_sample: 16bit
    use_mclk: true

# The block everyone leaves out
audio_adc:
  - platform: es7210
    id: es7210_adc
    i2c_id: bus_a
    address: 0x40
    sample_rate: 16000
    bits_per_sample: 16bit
    mic_gain: "24"

speaker:
  - platform: i2s_audio
    id: onboard_speaker
    i2s_audio_id: i2s_out
    i2s_dout_pin: GPIO16
    dac_type: external
    audio_dac: es8311_dac
    sample_rate: 16000
    bits_per_sample: 16bit
    channel: mono
    buffer_duration: 2s

microphone:
  - platform: i2s_audio
    id: onboard_mic
    i2s_audio_id: i2s_in
    i2s_din_pin: GPIO15
    adc_type: external
    sample_rate: 16000
    bits_per_sample: 16bit

light:
  - platform: esp32_rmt_led_strip
    id: led_ring
    name: "Status Ring"
    pin: GPIO38
    num_leds: 7
    chipset: ws2812
    rgb_order: GRB
    default_transition_length: 0s
Flash that and open the logs. The scan: true line in the I2C config makes ESPHome probe the bus on every boot and print what it finds, which is the single most useful diagnostic on this board. You’re looking for four addresses:
| Address | Chip |
|---|---|
| 0x18 | ES8311, speaker codec |
| 0x20 | TCA9555, I/O expander |
| 0x40 | ES7210, microphone ADC |
| 0x51 | PCF85063, real time clock |
All four means every chip is awake and responding. If one is missing, stop and sort that out before going any further, because nothing downstream will work without it. Assuming they’re all there and the board isn’t crash-looping, resist the urge to add the voice assistant yet (I know, I know… we’re getting to it).
Both chips run off the same clock lines, so their sample rates have to match. I’ve used 16000 for both. That number isn’t arbitrary either, it’s what the Assist pipeline expects for speech, and setting the mic to anything else produces recognition failures that look convincingly like a hardware fault.
One version note while you’re here. The ESPHome docs list mic_gain values as things like 24DB, but on 2026.7.4 it wanted "24" as a string. If you get a validation error on that line, that’s why.
What actually happens when you talk to it
Worth understanding before you install anything else, because the pieces only make sense together.
The board listens constantly for “Okay Nabu”, and that part happens on the chip itself. Nothing leaves your house. Once it hears the wake word, it streams the audio that follows to Home Assistant. Home Assistant passes that audio to a speech-to-text engine, which returns text. That text goes to a conversation agent that works out what you wanted. Then a text-to-speech engine turns the reply back into audio and sends it to the speaker on your board.
Speech-to-text is Whisper. Text-to-speech is Piper. Both run on your own hardware, which is the entire point of the exercise.
Installing Whisper and Piper
Pick the path that matches your setup and ignore the other one entirely. I wasted time bouncing between both sets of instructions.
On Home Assistant OS or Supervised, go to Settings, Add-ons, Add-on Store, search for Whisper, install it, and start it. Do the same for Piper. Home Assistant finds them over the Wyoming protocol by itself. You do not need to add the Wyoming Protocol integration manually and you do not need to type in a host or port. If you go looking for that step you’ll just confuse yourself, which is exactly what I did.
On Home Assistant Core in a container, or if you’d rather run Whisper on a machine with more grunt than your HA box, use Docker:
docker run -d \
  --name wyoming-whisper \
  --restart unless-stopped \
  --network host \
  rhasspy/wyoming-whisper \
  --model tiny \
  --language en
Then Settings, Devices & services, Add integration, Wyoming Protocol, pointed at that machine’s IP on port 10300.
Either way, the last step is telling Home Assistant to actually use them. Settings, Voice assistants, then set your pipeline’s speech-to-text to Whisper and text-to-speech to Piper. If those don’t appear in the dropdowns, the add-ons aren’t running yet.
Trap 6: Proxmox hides your CPU from Home Assistant
Both add-ons installed fine and then sat in a starting loop forever. The logs eventually gave me this:
RuntimeError: NumPy was built with baseline optimizations:
(X86_V2) but your machine doesn't support:
(X86_V2).
Along with a warning that my CPU didn’t support AVX.
That looked like ancient hardware, except my Proxmox host is nothing of the sort. The problem is that Proxmox defaults new VMs to a CPU type of kvm64, which deliberately hides most of the host’s instruction sets from the guest so that VMs can live-migrate between different hardware. NumPy inside the Whisper add-on is compiled expecting x86-64-v2, which needs SSE4.2 and POPCNT, and kvm64 doesn’t advertise either.
The fix is one setting. In the Proxmox web UI, select the HAOS VM, go to Hardware, double click Processors, and change Type to host. Then shut the VM down completely and start it again, because a reboot from inside the guest won’t apply it.
Whisper started immediately after that and began downloading its speech model, which pegged the VM at 101% CPU across 8 cores and made the whole Home Assistant UI unresponsive for a few minutes. That part is normal. Let it finish.
If you’re running HAOS on bare metal and hit the same error, you’ve genuinely got a pre-2008 CPU and the local add-ons aren’t going to work for you. Nabu Casa Cloud will do the speech processing instead, with the tradeoff that your audio leaves the house after the wake word fires.
Step 5: wake word and Assist
micro_wake_word does the wake word detection on the board. Nothing leaves the device until you’ve said “Okay Nabu”, which is the entire reason for going local, and it’s why the S3 chip matters. A plain ESP32 can’t run it.
If you’d rather a different wake word, swap okay_nabu for hey_jarvis, hey_mycroft or alexa. An S3 can run up to four models at once if you want more than one. Custom phrases mean training your own model through the microWakeWord framework, which is a whole project on its own. I looked into just “Nabu” with no “Okay” in front and gave up on it, partly because of the training work and partly because short wake words fire on ordinary conversation. There’s a reason every commercial one is three or four syllables.
The config for this section is tangled up with trap 7, so rather than show you a version you’ll have to fix twice, read the next bit and take the working version from the complete config at the end.
Trap 7: four ways the wake word stops working
This is the one that cost me the most compiles, and every symptom looks identical from the outside. You talk to it, nothing happens.
It never starts. micro_wake_word loads its model at boot and then sits there. It has to be told to start. My boot log cheerfully showed the Okay Nabu model loaded with a probability cutoff of 0.97 and I still got nothing, because the detector wasn’t running. Fixed with a micro_wake_word.start: in on_boot.
It stops after every trigger. The detector always stops itself the moment it hears the wake word, handing over to the voice assistant. Nothing starts it again unless you say so, which means one wake word per reboot. My first success felt like a fluke because the second attempt did nothing at all. Fixed by restarting it from on_end.
It restarts too early. The pipeline “ends” the moment Home Assistant has sent the response, not when the reply has finished playing. So a plain micro_wake_word.start: in on_end fires while the speaker is still going, the detector grabs the microphone mid-playback, and the log fills with this:
[E][voice_assistant:988]: Cannot receive audio, buffer is full
Both components then fight over the mic and it stays dead until you reboot. A wait_until on voice_assistant.is_running holds off until the assistant is genuinely finished.
It dead-ends when Home Assistant isn’t connected. This one only shows up after a reboot, and it’s my favourite of the four because it’s so tidy. The board comes up, WiFi connects, the detector starts, and Home Assistant takes another fifteen seconds to reconnect. Say the wake word in that window and you get:
[E][voice_assistant:677]: No API client connected
[D][voice_assistant:607]: State changed from IDLE to IDLE
The detector has already stopped itself. The voice assistant never entered a running state, so neither on_end nor on_error ever fires. Those are the only two things that restart the detector. The board sits there, fully booted, apparently fine, permanently deaf until you power cycle it.
The fix is two guards. Check api.connected before starting the voice assistant, and restart the detector yourself if it isn’t. Then also restart it whenever an API client connects, which covers Home Assistant restarting while the board has been sitting stopped.
Watch out for one thing there: the ESPHome dashboard counts as an API client. Without a voice_assistant.is_running guard, opening the log window mid-conversation restarts the detector in the middle of a response.
Trap 8: the volume, which is the one that actually hurt
Nothing in the config so far sets an output level, and the ES8311 defaults to full scale.
At 12:01am I said “Okay Nabu, how are you” and got a reply. It worked. It also came out at maximum volume from a unit sitting about a foot from my face, in a quiet house, at midnight. My heart rate took a good minute to come back down and I spent the next while convinced I’d blown the speaker. Home Assistant’s answer, for the record, was “Sorry, I couldn’t understand that”, which felt like an enormous amount of volume for very little content.
Set it in on_boot:
      - audio_dac.set_volume:
          id: es8311_dac
          volume: 70%
Now, the number. The scale is nothing like linear, and I burned three compiles finding that out. At 25% I couldn’t hear it at all and genuinely thought the speaker was dead. At 50% it was barely audible over a desk fan with the unit within arm’s reach. 70% is comfortable and normal sounding.
So don’t creep up in 5% steps like I did. Start at 70%, hold the unit away from your face for the first test, and adjust from there.
Step 6: try it
Say “Okay Nabu” and watch the logs. What you want to see, in order: the wake word detected with a probability score, the microphone starting, the pipeline running, then Speech recognised as: followed by whatever you actually said.
My first proper success was asking it how it was, and being told “Sorry, I couldn’t understand that.” Which is a win, even though it doesn’t sound like one. The default Home Assistant conversation agent only knows device commands, so it transcribed me perfectly and then had no idea what to do with the question. Everything in the chain worked.
When it doesn’t behave:
No API client connectedmeans the board heard you and had nowhere to send it. See traps 2 and 7.- Wake word never fires at all: check it’s actually been started, trap 7.
- Wake word fires and the transcription is nonsense: check the ES7210 initialised, it’ll be in the boot log.
- Everything works but you hear nothing back: either the amplifier (trap 4) or your volume is simply too low (trap 8).
- Random reboots: audio components are memory hungry, and the ESPHome docs specifically warn that adding Bluetooth or BLE alongside voice causes crashes. Give this board one job.
Worth knowing that not everyone gets there. One reviewer on the Amazon listing gave it two stars specifically because he couldn’t get wake word working with Home Assistant. Given how many people clearly have, I’d put that down to configuration rather than the hardware, but it does tell you this isn’t a five minute job.
Making it actually do something
Transcribing you is only half of it. To control the house, Home Assistant needs to know which entities the assistant is allowed to touch.
Settings, Voice assistants, Expose tab. Add whatever you want it controlling. I had 91 entities already exposed from previous messing about, so mine worked immediately.
Then say the thing. “Okay Nabu, turn on the furnace room light.” Mine went on and off first try, which after several hours of compiling was more satisfying than it probably should have been. My wife was not as excited as I was when I showed her.
The assistant matches on the entity’s friendly name, so if it tells you an entity doesn’t exist, the name it heard doesn’t match the name in Home Assistant. You can add aliases per entity rather than renaming everything.
Fine tuning
Everything above gets you a working satellite. Everything below is polish, and it’s the difference between a thing that works and a thing you’d actually want on your desk.
Make the LED ring mean something
Seven addressable LEDs sitting there doing nothing is a waste, and the visual feedback genuinely helps. You stop having to guess whether it heard you.
I settled on solid blue while it listens, amber spinning while it thinks, green pulsing while it talks, and off when idle. The spinning and pulsing come from two effects defined on the light, one addressable_scan and one pulse.
Worth knowing that the pulse isn’t synced to the speech. ESPHome can’t read the amplitude of audio while it plays, so there’s no way to make the ring flash in time with the words. It’s a timer, and it looks alive, which is close enough.
Two details that cost me compiles. Set default_transition_length: 0s or the colours fade lazily into each other instead of snapping. And in on_end, put the light change after the wait_until, not before it. I had it before, and the green light died about 300 milliseconds into a two second response, which had me convinced the whole thing was broken when it was working fine.
Show when it can’t reach Home Assistant
This came directly out of trap 7. After a reboot there’s a window where the board is up and listening but Home Assistant hasn’t reconnected, and nothing on the device tells you that. You just talk to it and get silence.
A spinning red ring, on from boot and off the moment an API client connects, makes that state obvious. The on_end handler checks api.connected too, so if Home Assistant drops mid-session the ring goes back to red rather than pretending everything’s fine.
The clicking, and a fix that made things much worse
Mine clicks on power up and again each time it starts speaking.
The cause is the NS4150B. It’s a class-D amp with no click-pop suppression, so when the I2S peripheral starts or stops, the data line steps from idle to active and the amp faithfully amplifies that step. Same thing when the amp enable line itself toggles.
The power-up click I did fix. The amp switch was set to restore_mode: ALWAYS_ON, which enables the amp very early in boot, before the ES8311 has been configured, so it amplifies whatever noise an unconfigured DAC puts out. Setting it to ALWAYS_OFF and turning it on from on_boot after a short delay sequences it properly.
The speaking click is where I went wrong.
timeout: never on the speaker keeps the I2S peripheral running instead of stopping it between responses, which does stop the click. It also stops the speaker ever reporting that it finished. Which means the voice assistant never leaves RESPONSE_FINISHED, the wait_until in on_end blocks forever, and the wake word never restarts. The device answers you once and is then deaf until you power cycle it.
I traded an audible click for a lockup, and it took a while to connect the two because the symptom showed up in a completely different part of the system.
Don’t use timeout: never. It’s not in the config below.
There is a real fix, and it’s documented. ESPHome’s i2s_audio media_player platform has a mute_pin option that the speaker platform doesn’t. Point it at the amp enable line and ESPHome sequences the amp automatically, muting before the stream stops and unmuting after it starts. That’s exactly the suppression this hardware needs.
Which conveniently is the same change I need for the next problem.
Choppy or cut-off speech
Not solved, and I’d rather say so than pretend.
Every so often a response comes out mangled, either dropping syllables in the middle (“sorryn coufn usn that”) or cutting off the tail. The log shows why:
[E][voice_assistant:988]: Cannot receive audio, buffer is full   (x11)
[D][voice_assistant:958]: TTS stream end
Home Assistant sends audio faster than the board plays it back, and anything that won’t fit in the buffer gets thrown away. The overflow happens at the end of the stream, so that’s the part you lose.
buffer_duration: 100ms, which I’d copied from the official ESP32-S3-Box config, is far too small here. 500ms improved it. 2s is better again.
It scales badly though. A two second reply fits in a two second buffer. A fifteen second answer from an LLM will not. The proper fix is the same media_player wrapper that solves the clicking, which buffers correctly rather than relying on a fixed ring. Two problems, one structural change, and it’s going in part two.
Credit
I didn’t reverse engineer any of this. Three people got there first and published their work, which is the only reason this post is possible:
- hannes813 published the verified pin mapping and worked out the ES7210 microphone finding
- sw3Dan solved the shared I2S bus problem and patched the ES8311 component so the board can play audio and listen for a wake word simultaneously
- jensenbox published a machine-readable pinout covering the whole board, including the LCD, camera and SD card headers
If you want music playback and wake word listening at the same time, you’ll need sw3Dan’s patched component. I haven’t gone there yet.
The whole config in one piece
Everything together, working. Swap in your own device name and IP.
substitutions:
  devicename: voice-satellite

esphome:
  name: voice-satellite
  friendly_name: Voice Satellite
  on_boot:
    priority: -100
    then:
      - audio_dac.set_volume:
          id: es8311_dac
          volume: 70%
      - delay: 500ms
      - switch.turn_on: amp_enable
      - micro_wake_word.start:
      - light.turn_on:
          id: led_ring
          red: 100%
          green: 0%
          blue: 0%
          brightness: 30%
          effect: "Scan"

esp32:
  board: esp32-s3-devkitc-1
  flash_size: 16MB
  framework:
    type: esp-idf

psram:
  mode: octal
  speed: 80MHz

logger:

api:
  on_client_connected:
    - if:
        condition:
          not:
            voice_assistant.is_running:
        then:
          - micro_wake_word.start:
          - light.turn_off: led_ring
  on_client_disconnected:
    - if:
        condition:
          not:
            api.connected:
        then:
          - light.turn_on:
              id: led_ring
              red: 100%
              green: 0%
              blue: 0%
              brightness: 30%
              effect: "Scan"

ota:
  - platform: esphome

wifi:
  ssid: !secret wifi_ssid
  password: !secret wifi_password
  reboot_timeout: 0s
  min_auth_mode: WPA2
  use_address: 192.168.30.50
  ap:
    ssid: "IoT ${devicename}"
    password: !secret iot_wifi_password

i2c:
  - id: bus_a
    sda: GPIO11
    scl: GPIO10
    scan: true
    frequency: 400kHz

tca9555:
  - id: expander
    address: 0x20
    i2c_id: bus_a

switch:
  - platform: gpio
    id: amp_enable
    name: "Speaker Amp"
    restore_mode: ALWAYS_OFF
    pin:
      tca9555: expander
      number: 8
      mode:
        output: true

i2s_audio:
  - id: i2s_out
    i2s_lrclk_pin:
      number: GPIO14
      allow_other_uses: true
    i2s_bclk_pin:
      number: GPIO13
      allow_other_uses: true
    i2s_mclk_pin:
      number: GPIO12
      allow_other_uses: true
  - id: i2s_in
    i2s_lrclk_pin:
      number: GPIO14
      allow_other_uses: true
    i2s_bclk_pin:
      number: GPIO13
      allow_other_uses: true
    i2s_mclk_pin:
      number: GPIO12
      allow_other_uses: true

audio_dac:
  - platform: es8311
    id: es8311_dac
    i2c_id: bus_a
    address: 0x18
    sample_rate: 16000
    bits_per_sample: 16bit
    use_mclk: true

audio_adc:
  - platform: es7210
    id: es7210_adc
    i2c_id: bus_a
    address: 0x40
    sample_rate: 16000
    bits_per_sample: 16bit
    mic_gain: "24"

# No "timeout: never" here. See the fine tuning section for why that one
# looks like a good idea and isn't.
speaker:
  - platform: i2s_audio
    id: onboard_speaker
    i2s_audio_id: i2s_out
    i2s_dout_pin: GPIO16
    dac_type: external
    audio_dac: es8311_dac
    sample_rate: 16000
    bits_per_sample: 16bit
    channel: mono
    buffer_duration: 2s

microphone:
  - platform: i2s_audio
    id: onboard_mic
    i2s_audio_id: i2s_in
    i2s_din_pin: GPIO15
    adc_type: external
    sample_rate: 16000
    bits_per_sample: 16bit

light:
  - platform: esp32_rmt_led_strip
    id: led_ring
    name: "Status Ring"
    pin: GPIO38
    num_leds: 7
    chipset: ws2812
    rgb_order: GRB
    default_transition_length: 0s
    effects:
      - addressable_scan:
          name: "Scan"
          move_interval: 120ms
          scan_width: 2
      - pulse:
          name: "Pulse"
          transition_length: 200ms
          update_interval: 400ms

micro_wake_word:
  id: mww
  microphone: onboard_mic
  models:
    - okay_nabu
  on_wake_word_detected:
    - if:
        condition:
          api.connected:
        then:
          - voice_assistant.start:
        else:
          - delay: 1s
          - micro_wake_word.start:

voice_assistant:
  id: va
  microphone: onboard_mic
  speaker: onboard_speaker
  micro_wake_word: mww

  # Listening: solid blue
  on_listening:
    - light.turn_on:
        id: led_ring
        red: 0%
        green: 0%
        blue: 100%
        brightness: 60%

  # Thinking: amber, spinning
  on_stt_vad_end:
    - light.turn_on:
        id: led_ring
        red: 100%
        green: 60%
        blue: 0%
        brightness: 60%
        effect: "Scan"

  # Speaking: green, pulsing
  on_tts_start:
    - light.turn_on:
        id: led_ring
        red: 0%
        green: 100%
        blue: 0%
        brightness: 60%
        effect: "Pulse"

  # Idle state depends on whether Home Assistant is still there
  on_end:
    - wait_until:
        not:
          voice_assistant.is_running:
    - if:
        condition:
          api.connected:
        then:
          - light.turn_off: led_ring
        else:
          - light.turn_on:
              id: led_ring
              red: 100%
              green: 0%
              blue: 0%
              brightness: 30%
              effect: "Scan"
    - micro_wake_word.start:

  # Safety net in case on_end doesn't fire on an error path. The guard stops
  # it starting the detector twice when both triggers run.
  on_error:
    - delay: 2s
    - if:
        condition:
          not:
            voice_assistant.is_running:
        then:
          - micro_wake_word.start:
What’s next
Part two I hope is the LLM. Right now the built-in conversation agent handles device commands and nothing else, which is why “how are you” gets an apology. Pointing the pipeline at a language model turns it into something you can actually talk to, and it forces both the buffering and the clicking to get solved properly rather than papered over.
After that, building a satellite from parts I choose instead of a dev board. Then my own enclosure, with something more interesting in it than another anonymous white puck on a shelf.
If you get stuck somewhere I didn’t, leave a comment. That’s usually where the useful information ends up anyway.