
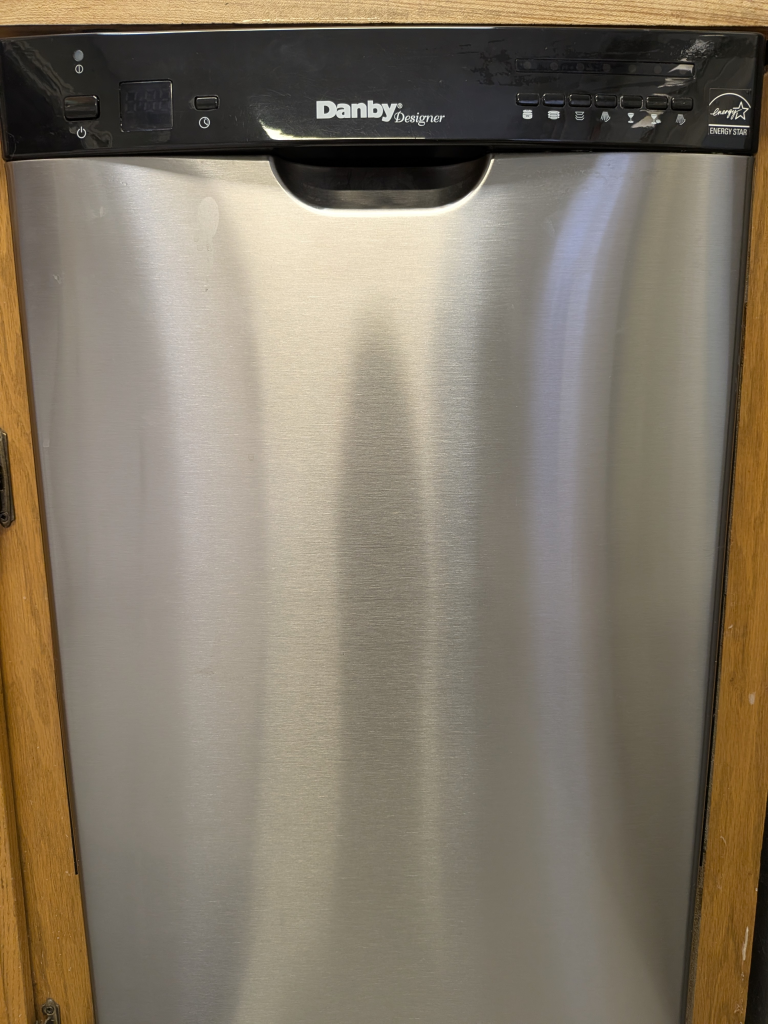
You know that sinking feeling when you open the dishwasher expecting clean dishes, only to find a pool of dirty water sitting at the bottom? Yeah. That was my life for a few weeks, and I was convinced the whole unit was dying on me, but the issue was so random.
My Danby Designer DDW1802EBLS (an apartment-sized dishwasher, because my kitchen is about as spacious as a broom closet) had started acting up. Cycles would just… stop. No error codes, no beeping, no drama. It would simply quit, usually before it got to the drain cycle. Open the door, and there’s yesterday’s dinner water staring back at you. Lovely.
My first thought? The dishwasher is on its way out. And honestly, I was not prepared to shell out for a new one with everything else going on in life. So before accepting defeat, I started poking around.
The Symptoms
Here’s what was happening: the dishwasher would start a cycle just fine, run for a while, and then silently lose power somewhere in the middle. The power switch on the front was still pressed in. It looked like the machine was “on” but the unit had no actual power. No lights, no pump, nothing. Just a tub full of water that never got drained.
At first it seemed random, but after paying closer attention, I noticed it tended to happen during the more aggressive parts of the cycle… when the spray arms were going full blast and the whole unit was vibrating. That was the clue.
Narrowing It Down
After some testing, I figured out the power switch was the culprit. The vibration from normal operation was enough to intermittently break the connection. The switch was physically in the “on” position, but electrically? It was checked out. Power was cutting in and out, and once it cut out during a cycle, it wasn’t coming back without manually toggling the switch off and on and starting a cycle again.
What really confirmed it was that I could reproduce the problem on demand. If I just barely touched the power switch… not even pressed it, just the lightest tap… the dishwasher would cut out and restart. That was enough for me to point the finger at the switch and order a replacement.
At the time, I figured the switch itself was just wearing out (I mean, its been nearly 8 years of daily cycles). So we kept using the dishwasher while the new part shipped. In hindsight… that was not the smartest call, but I’ll get to that.
This is one of those problems that can drive you nuts because everything looks fine from the outside.
Finding the Part
The model number on my unit is DDW1802EBLS, manufactured in November 2017.
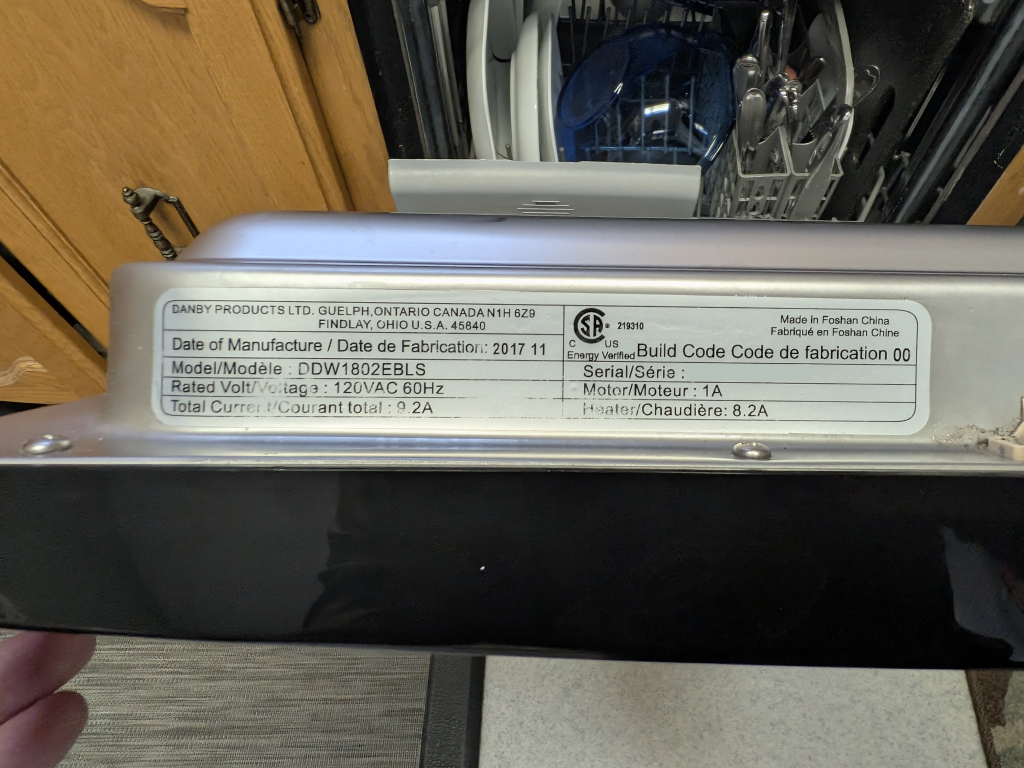
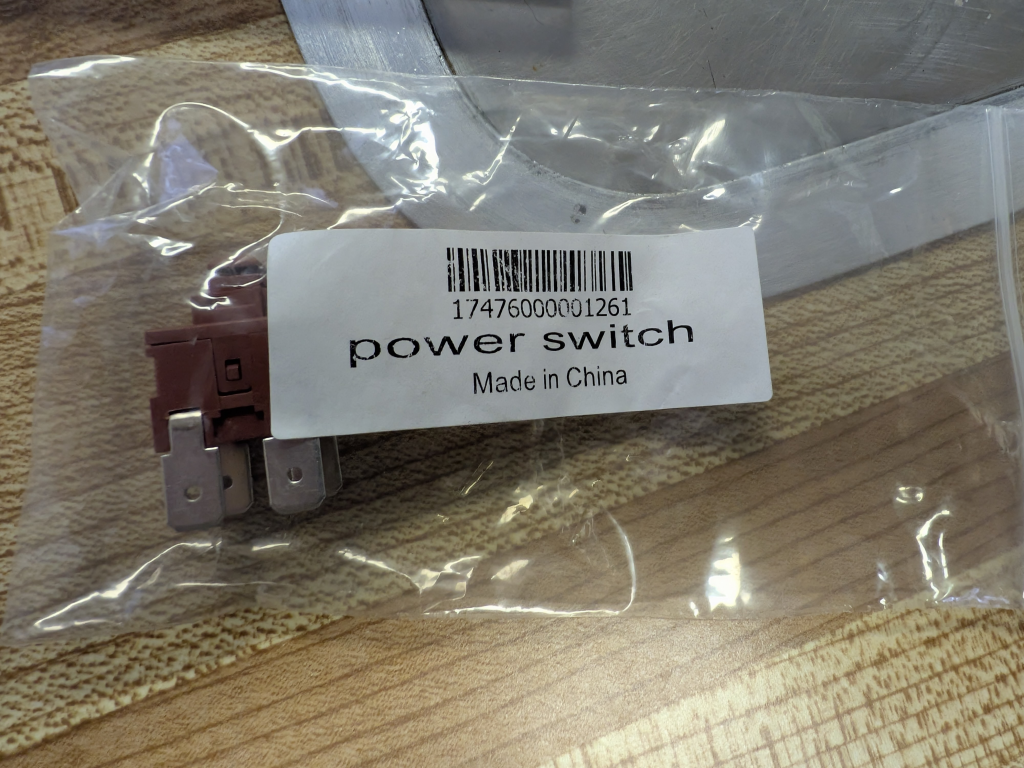
I tracked down a replacement power switch through Home Depot’s repair parts, which is fulfilled by Reliable Parts here in Canada. The SKU is 17476000001261. The switch itself was about $16… and then shipping was another $25. Because of course it was. Shipping on small appliance parts in Canada is basically highway robbery.
Still, $41 total versus several hundred for a new dishwasher? I’ll take it.
What You’ll Need
- Phillips screwdriver
- The replacement power switch
- About 20 minutes
- A healthy respect for electricity
Disconnect the Power First
Before you touch anything, disconnect the power to the dishwasher. Turn off the breaker. Unplug it if you can. The power switch is wired directly to mains voltage. We’re talking 120V here, not some low-voltage logic board signal. This is the kind of thing that can ruin your whole day (or worse) if you’re not careful. Don’t skip this step. I mean it.
Getting to the Switch
Open the dishwasher door and you’ll see screws along the inside edge of the front panel. There are 12 screws total, but you’re going to tackle them in two stages.
The first 8 screws (circled in red in the image below) hold the stainless steel decorative front cover in place. These are all Phillips head. Fair warning though… the stainless steel cover is surprisingly heavy. I fully expected it to be flimsy sheet metal, but nope. It’s actually a solid, decent quality panel. It’s not a two person lift or anything, but it will absolutely drop if you’re not supporting it from underneath as you remove those last couple of screws.
Here’s the other thing nobody tells you. Once that stainless cover is off, the door loses a good chunk of its weight. That means the door now wants to keep swinging closed on you while you’re trying to work on the control board screws behind it. It’s not dangerous, just annoying. Prop it open with something or have someone hold it for you. I didn’t, and I regretted it.
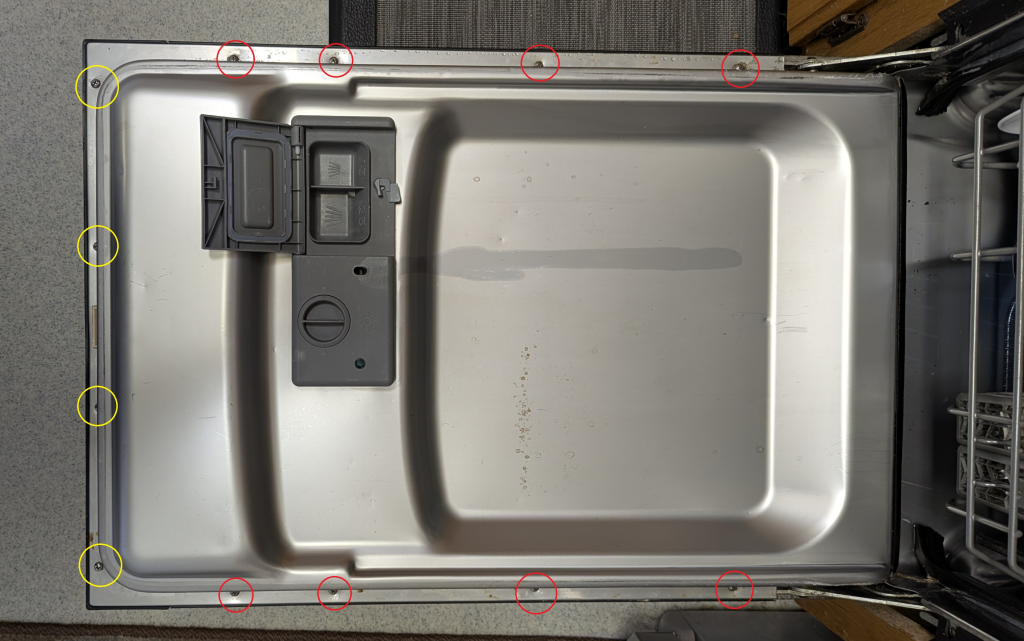
With the stainless front off, you’ll now see the 4 remaining screws (circled in yellow) that hold the control board panel in place. Remove these carefully. Be gentle here. When this panel comes off, there are wires connected to the back of it. Don’t yank it away from the door. Just let it hang or carefully support it so you can access the back side.
Now flip the control board panel over (or angle it so you can see the back), and you’ll find the power switch mounted with 2 Phillips screws (circled in red in the image below).
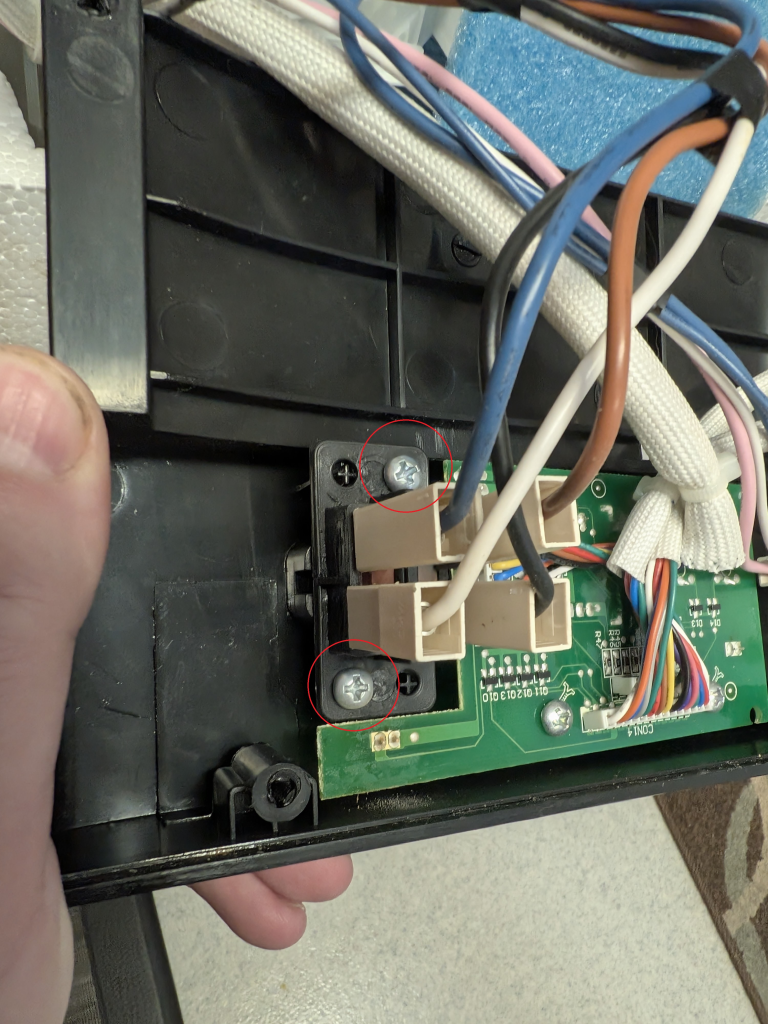
Remove those two screws and disconnect the switch. Take note of the wiring (important!) so you can connect the new one the exact same way.
Inspecting the Damage
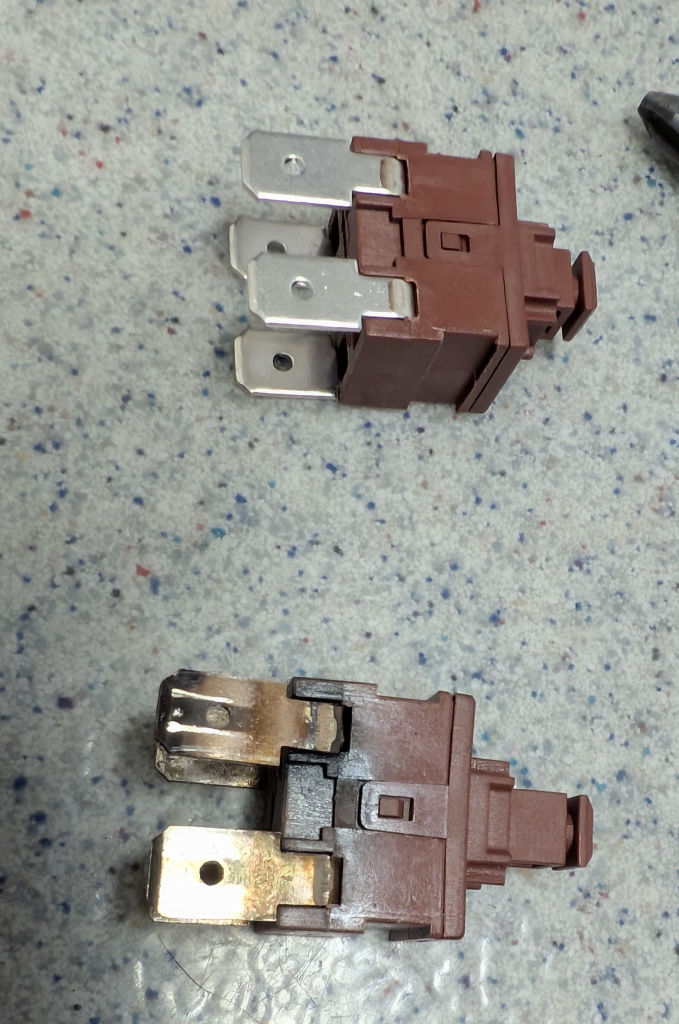
When I pulled the old switch out and flipped it over, the cause was immediately obvious. The back of the switch was blackened, and the wire contacts showed clear signs of scorching and arcing. One of the electrical legs on the switch had become loose, which meant every time the dishwasher vibrated, it would momentarily lose connection. That repeated arcing had charred the switch housing and the wire insulation.
Remember how I said we kept using the dishwasher while the new switch shipped? Yeah. What I thought was just a dying switch was actually a loose or broken leg that had been arcing every single time the connection broke. If I had known that at the time, I would have stopped using it immediately. A loose contact arcing inside the switch on mains voltage is not something you want to just casually keep running. Looking at the scorch marks on this thing, I got lucky it didn’t cause something a lot worse.
Putting It Back Together
Installing the new switch is just the reverse. Mount it with the two screws, reconnect the wiring, and you’re good to go.
Before putting the stainless steel cover back on, I temporarily restored power at the breaker and tested the switch to make sure everything was working. The dishwasher powered on, the controls responded, and I ran a quick cycle to confirm. No more random shutdowns.
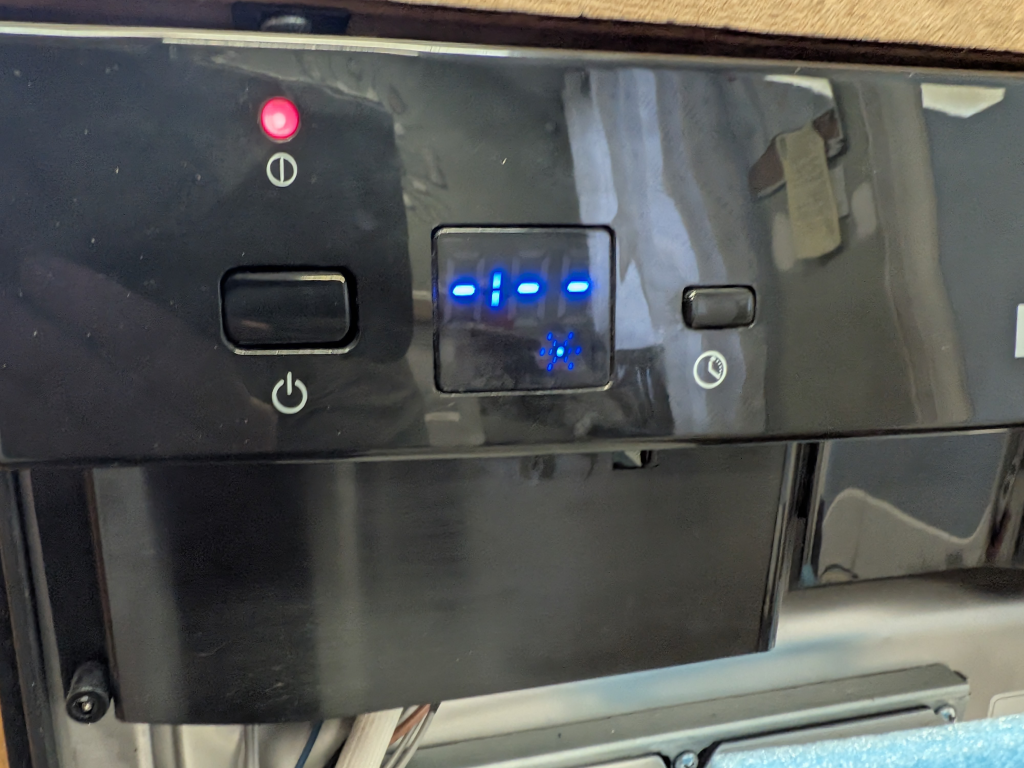
Once confirmed, kill the breaker again, reinstall the stainless cover (8 screws), close up, and you’re done.
The Whole Picture
Total time: about 20 minutes. Total cost: about $41 (switch + shipping). Total satisfaction: immeasurable.
What I thought was a dying dishwasher turned out to be a single loose leg on a $16 power switch. The vibrations from normal wash cycles were just enough to break the connection, killing power mid-cycle and leaving us with a tub full of dirty water every time.
If your Danby apartment-sized dishwasher is randomly losing power mid-cycle, especially if the switch still appears to be in the “on” position… don’t write it off just yet. Check the power switch. You might just save yourself a few hundred bucks and a trip to the appliance store.