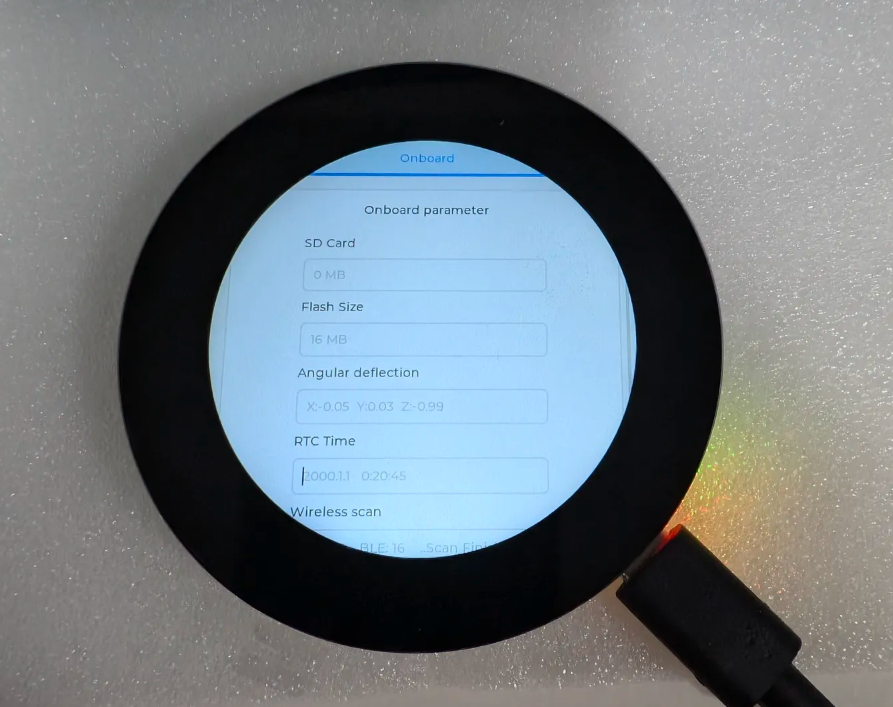
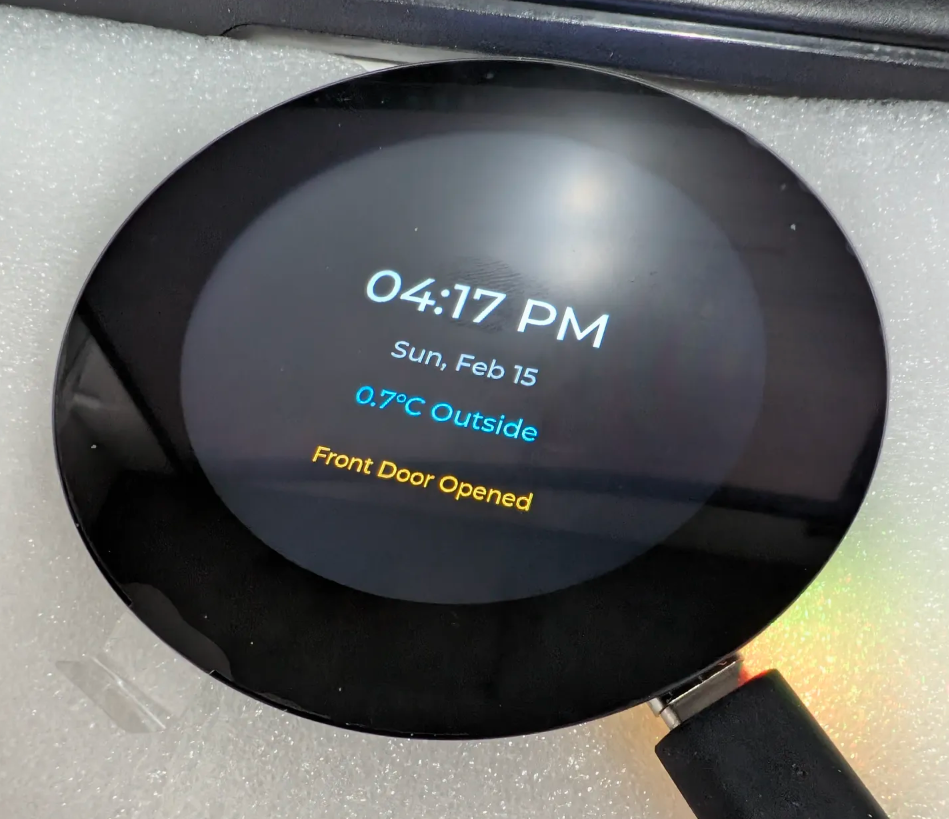
I had a Waveshare ESP32-S3-Touch-LCD-2.1 sitting in a drawer for weeks (okay, maybe months). Round 480×480 touchscreen, looked cool in the product photos, but I had no idea what to actually build with it. So I started with something practical… an ESPHome bedside clock display that pulls time, weather, and notifications from Home Assistant. It turned out to be a great first project for this board, and it’s genuinely useful on a nightstand.
This guide walks through the entire build from start to finish. I’m assuming you’ve already got the ESPHome add-on installed in Home Assistant. If you’re starting from scratch with ESPHome, get that set up first and come back here.
What You’ll Need
- Waveshare ESP32-S3-Touch-LCD-2.1 (about $60 CAD from Amazon Canada)
- USB-C cable (for first-time flashing and power)
- A computer with Chrome or Edge (for the initial USB flash)
- Home Assistant with the ESPHome add-on already running
That’s it. No soldering, no extra sensors, no breadboard. Just the board and a cable.
What We’re Building
By the end of this guide, you’ll have a round display sitting on your nightstand that shows:
- Current time and date (synced from Home Assistant)
- Outdoor temperature (pulled from any HA weather or temperature sensor)
- Notification pop-ups (triggered by any HA automation or Node Red)
- Auto-dimming backlight (bright during the day, dim at night)
We’ll build this up one piece at a time so you can verify each step works before moving on. If something breaks, you’ll know exactly which step caused it.
Step 1: Create a New Device in ESPHome
Open your Home Assistant instance and go to the ESPHome dashboard. You’ll find it in the sidebar if you’ve installed the add-on.
Click the green + New Device button in the bottom right corner. When it asks how you want to set it up, choose Continue on the first dialog (we don’t need the wizard to discover anything). Give it a name… I went with bedside-clock. Pick ESP32-S3 as the device type.
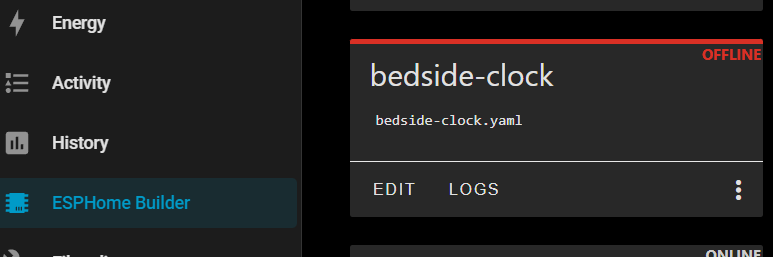
ESPHome will generate a basic starter config. Don’t install it yet. Click Skip on the install dialog for now. You should see your new device card on the ESPHome dashboard with a red “OFFLINE” tag. That’s expected since we haven’t flashed anything.
Now click the Edit button on the device card. Delete everything in the editor. We’re going to replace it with a config that actually works for this specific board.
Step 2: Paste the Base Config and Flash Over USB
Paste this into the editor. This is just the foundation… it gets the board on your Wi-Fi and talking to Home Assistant, but doesn’t do anything with the display yet.
esphome:
  name: bedside-clock
  friendly_name: Bedside Clock

esp32:
  board: esp32-s3-devkitc-1
  flash_size: 8MB
  variant: esp32s3
  framework:
    type: esp-idf
    sdkconfig_options:
      CONFIG_ESPTOOLPY_FLASHFREQ: "80MHz"
      CONFIG_ESPTOOLPY_FLASHMODE_QIO: y
      CONFIG_FLASHMODE_QIO: y
      CONFIG_ESP_DEFAULT_CPU_FREQ_MHZ_240: y
      CONFIG_ESP_DEFAULT_CPU_FREQ_MHZ: '240'
      CONFIG_SPIRAM_RODATA: "y"

psram:
  mode: octal
  speed: 80MHz

logger:

api:
  encryption:
    key: "PASTE_YOUR_API_KEY_HERE"  # The base64 key you saved from Step 1

ota:
  - platform: esphome
    password: "bedside-clock-ota"  # Pick any password you want

wifi:
  ssid: !secret wifi_ssid
  password: !secret wifi_password
  ap:

captive_portal:
Replace PASTE_YOUR_API_KEY_HERE with the base64 key you copied in Step 1. It’ll look something like "aBcDeFgHiJkLmNoPqRsTuVwXyZ1234567890ABCD=". The Wi-Fi credentials use !secret references, which ESPHome should already have from your other devices… if you’ve never set those up, click the Secrets button in the top right of the ESPHome dashboard and add your wifi_ssid and wifi_password there.
A couple things to note before you flash. The framework must be esp-idf, not Arduino. This board’s display driver doesn’t play nice with the Arduino framework. The psram section is set to octal mode at 80MHz because that’s what this board’s memory hardware needs… skip it and the display library will crash later with zero helpful error messages. Ask me how I know.
Now plug the Waveshare board into your computer with a USB-C cable. Click Install in the ESPHome editor, then choose Plug into this computer. A browser dialog will pop up asking you to select a serial port. Pick the one that appeared when you plugged the board in (on Windows it’ll be something like COM3 or COM4).
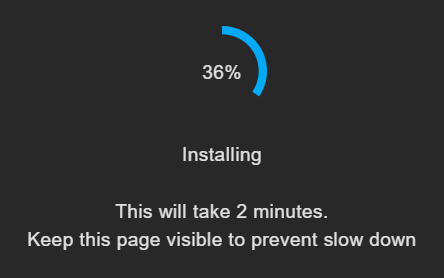
The first flash takes a few minutes since it’s compiling the whole firmware from scratch. Once it finishes, the board will reboot and connect to your Wi-Fi. Back in Home Assistant, you should get a notification that a new ESPHome device was discovered. Click Configure and add it.
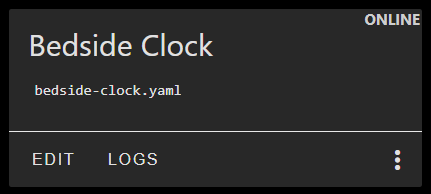
How to verify this step worked: Go to Settings > Devices & Services > ESPHome in Home Assistant. You should see “Bedside Clock” listed as online. If it shows up, the board is connected and you’re good to move on. Every step from here can be flashed wirelessly… no more USB cable needed.
Step 3: Add the Display and Touch Configuration
Now we light up that screen. Go back to the ESPHome dashboard, click Edit on your bedside-clock device, and add the following sections below what you already have.
This is the longest chunk of config in the entire build. The display driver (ST7701S) needs a very specific initialization sequence to work with this panel, and the values aren’t intuitive. I originally found this config from a Home Assistant Community thread after a good hour of staring at a black screen. Don’t try to tweak the hex values in the init_sequence unless you really know what you’re doing… just paste it as-is.
pca9554:
  - id: p_c_a
    address: 0x20
    i2c_id: i2c_bus

output:
  - platform: ledc
    id: gpio_backlight_pwm
    pin: GPIO06
    frequency: 100Hz
    channel: 0

light:
  - platform: monochromatic
    output: gpio_backlight_pwm
    name: Display Backlight
    icon: mdi:lightbulb-on
    id: display_backlight
    restore_mode: ALWAYS_ON
    gamma_correct: 1

i2c:
  - id: i2c_bus
    sda: 15
    scl: 7

touchscreen:
  - platform: cst816
    calibration:
      x_min: 0
      x_max: 430
      y_min: 0
      y_max: 480
    id: my_touchscreen
    i2c_id: i2c_bus
    reset_pin:
      pca9554: p_c_a
      number: 1
    interrupt_pin: GPIO16

spi:
  - id: spi_lcd
    clk_pin: GPIO02
    mosi_pin: GPIO01
    interface: spi3

display:
  - platform: st7701s
    id: screen
    spi_mode: MODE0
    data_rate: 40Mhz
    color_order: RGB
    auto_clear_enabled: false
    update_interval: never
    dimensions:
      width: 480
      height: 480
    cs_pin:
      pca9554: p_c_a
      number: 2
    reset_pin:
      pca9554: p_c_a
      number: 0
    de_pin: GPIO40
    hsync_pin: GPIO38
    vsync_pin: GPIO39
    pclk_pin: GPIO41
    pclk_frequency: 16Mhz
    pclk_inverted: false
    hsync_pulse_width: 8
    hsync_back_porch: 10
    hsync_front_porch: 50
    vsync_pulse_width: 3
    vsync_back_porch: 8
    vsync_front_porch: 8
    data_pins:
      red:
        - 46
        - 3
        - 8
        - 18
        - 17
      green:
        - 14
        - 13
        - 12
        - 11
        - 10
        - 9
      blue:
        - 5
        - 45
        - 48
        - 47
        - 21
    init_sequence:
      - [0xFF, 0x77, 0x01, 0x00, 0x00, 0x10]
      - [0xC0, 0x3B, 0x00]
      - [0xC1, 0x0B, 0x02]
      - [0xC2, 0x07, 0x02]
      - [0xCC, 0x10]
      - [0xCD, 0x08]
      - [0xB0, 0x00, 0x11, 0x16, 0x0e, 0x11, 0x06, 0x05, 0x09, 0x08, 0x21, 0x06, 0x13, 0x10, 0x29, 0x31, 0x18]
      - [0xB1, 0x00, 0x11, 0x16, 0x0e, 0x11, 0x07, 0x05, 0x09, 0x09, 0x21, 0x05, 0x13, 0x11, 0x2a, 0x31, 0x18]
      - [0xFF, 0x77, 0x01, 0x00, 0x00, 0x11]
      - [0xB0, 0x6d]
      - [0xB1, 0x37]
      - [0xB2, 0x81]
      - [0xB3, 0x80]
      - [0xB5, 0x43]
      - [0xB7, 0x85]
      - [0xB8, 0x20]
      - [0xC1, 0x78]
      - [0xC2, 0x78]
      - [0xD0, 0x88]
      - [0xE0, 0x00, 0x00, 0x02]
      - [0xE1, 0x03, 0xA0, 0x00, 0x00, 0x04, 0xA0, 0x00, 0x00, 0x00, 0x20, 0x20]
      - [0xE2, 0x00, 0x00, 0x00, 0x00, 0x00, 0x00, 0x00, 0x00, 0x00, 0x00, 0x00, 0x00, 0x00]
      - [0xE3, 0x00, 0x00, 0x11, 0x00]
      - [0xE4, 0x22, 0x00]
      - [0xE5, 0x05, 0xEC, 0xA0, 0xA0, 0x07, 0xEE, 0xA0, 0xA0, 0x00, 0x00, 0x00, 0x00, 0x00, 0x00, 0x00, 0x00]
      - [0xE6, 0x00, 0x00, 0x11, 0x00]
      - [0xE7, 0x22, 0x00]
      - [0xE8, 0x06, 0xED, 0xA0, 0xA0, 0x08, 0xEF, 0xA0, 0xA0, 0x00, 0x00, 0x00, 0x00, 0x00, 0x00, 0x00, 0x00]
      - [0xEB, 0x00, 0x00, 0x40, 0x40, 0x00, 0x00, 0x00]
      - [0xED, 0xFF, 0xFF, 0xFF, 0xBA, 0x0A, 0xBF, 0x45, 0xFF, 0xFF, 0x54, 0xFB, 0xA0, 0xAB, 0xFF, 0xFF, 0xFF]
      - [0xEF, 0x10, 0x0D, 0x04, 0x08, 0x3F, 0x1F]
      - [0xFF, 0x77, 0x01, 0x00, 0x00, 0x13]
      - [0xEF, 0x08]
      - [0xFF, 0x77, 0x01, 0x00, 0x00, 0x00]
      - [0x36, 0x00]
      - [0x3A, 0x66]
      - [0x11]
      - delay 120ms
      - [0x29]
      - delay 20ms
Yeah, that init_sequence is brutal. But it works. Don’t touch it.
One thing worth noting is the skip_probe: true on the touchscreen config. This board’s touch controller is a CST820 variant, but some board revisions report an unrecognized chip ID that makes ESPHome mark the touchscreen as failed. Skipping the probe tells ESPHome to just use the driver without checking… the touch protocol is the same either way, so it works fine.
Click Install in the ESPHome editor and choose Wirelessly this time (since the board is already on your network from Step 2). The compile and upload will take a couple minutes.
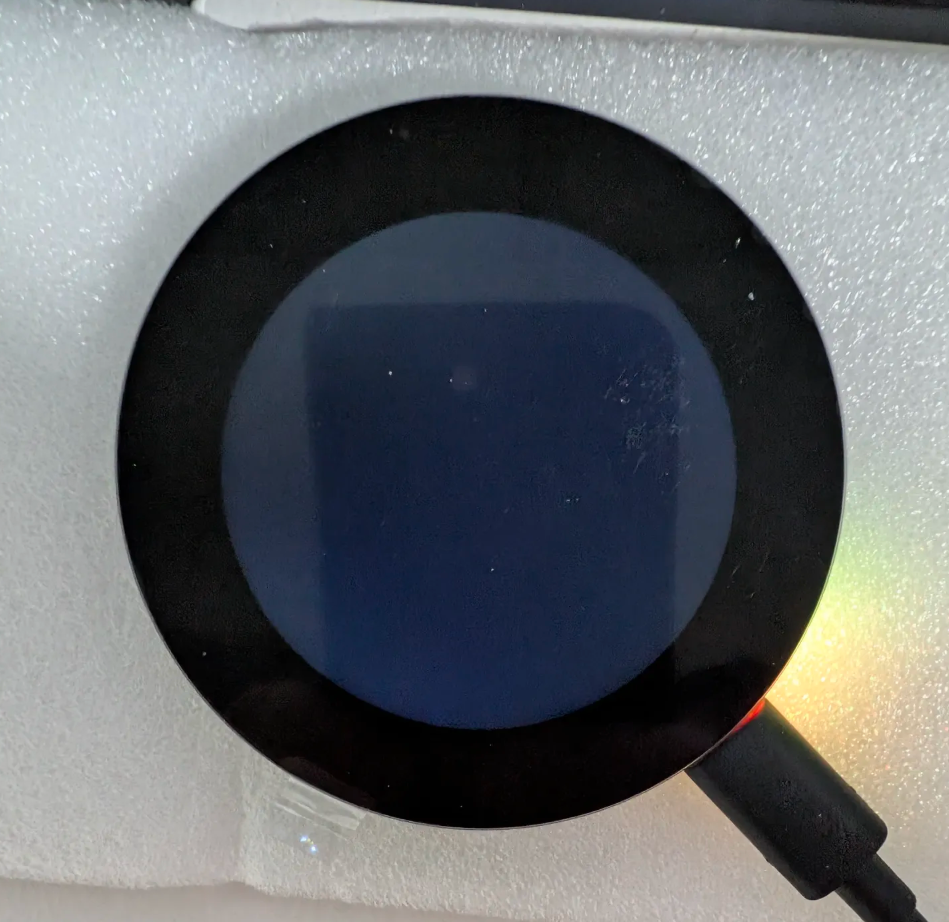
How to verify this step worked: After the board reboots, the display backlight should turn on. You’ll probably just see a solid color or a white/black screen at this point (can be hard to see)… that’s fine. The screen is alive. If the backlight doesn’t come on at all, double-check your output and light sections. In Home Assistant, you should also see a new Display Backlight light entity under your Bedside Clock device. Try toggling it on and off from HA to confirm the backlight is responding.
Step 4: Add the Clock Face with LVGL
Now for the fun part. We’re going to add LVGL (a graphics library that ESPHome supports natively) to draw the actual clock interface. Add this section below everything else in your config:
lvgl:
  displays:
    - screen
  touchscreens:
    - my_touchscreen
  pages:
    - id: clock_page
      bg_color: 0x000000
      bg_opa: COVER
      widgets:
        - label:
            id: time_label
            align: CENTER
            y: -30
            text: "00:00"
            text_font: montserrat_48
            text_color: 0xFFFFFF
        - label:
            id: date_label
            align: CENTER
            y: 30
            text: "Loading..."
            text_font: montserrat_22
            text_color: 0xAAAAAA
        - label:
            id: weather_label
            align: CENTER
            y: 80
            text: ""
            text_font: montserrat_22
            text_color: 0x4FC3F7
        - label:
            id: notification_label
            align: CENTER
            y: 140
            text: ""
            text_font: montserrat_18
            text_color: 0xFFA726
            hidden: true
This will create four labels stacked vertically on the display:
- time_label at the top in large white text (
montserrat_48is the biggest built-in font) - date_label just below it in smaller gray text
- weather_label further down in light blue
- notification_label at the bottom in orange, hidden by default (we’ll show it when notifications come in)
The y values control vertical position. Negative values move up from center, positive moves down. The align: CENTER handles horizontal centering automatically.
We also need to tell LVGL when to update the time. Add this section below the lvgl block:
time:
  - platform: homeassistant
    id: ha_time
    on_time:
      - seconds: 0
        then:
          - lvgl.label.update:
              id: time_label
              text: !lambda |-
                return id(ha_time).now().strftime("%H:%M");
          - lvgl.label.update:
              id: date_label
              text: !lambda |-
                return id(ha_time).now().strftime("%a, %b %d");
This syncs the clock from Home Assistant’s time (so it’s always accurate) and updates the display every minute when the seconds hit zero. The strftime formatting gives you hours and minutes on the first label, and something like “Sat, Feb 15” on the second.
If you prefer 12-hour format, change "%H:%M" to "%I:%M %p" and you’ll get something like “09:30 PM” instead.
Click Install > Wirelessly again.
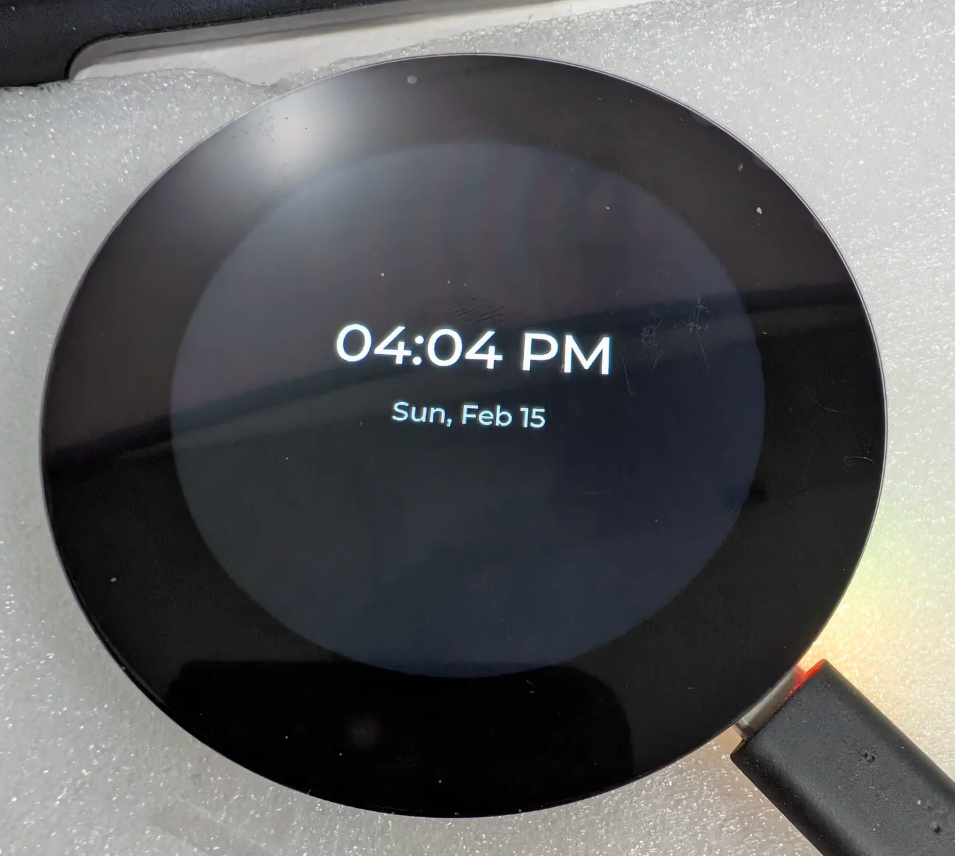
How to verify this step worked: After the reboot, you should see “00:00” and “Loading…” on the display for a few seconds while it connects to HA. Once it syncs, the current time and date should appear. If you see the time but the date still says “Loading…”, wait up to a minute for the next on_time trigger to fire. If the screen stays blank, check the ESPHome logs (click Logs on the device card) for any LVGL errors.
Step 5: Add Weather from Home Assistant
Now let’s pull in outdoor temperature. You need to know the entity ID of a temperature sensor in your Home Assistant instance. Go to Settings > Devices & Services, find your weather integration, and look at its sensor entities. Common ones are sensor.outdoor_temperature, sensor.home_temperature, or if you’re using a weather integration like Environment Canada, it might be weather.forecast_home with a temperature attribute.
Add this section to your ESPHome config:
sensor:
  - platform: homeassistant
    id: outdoor_temp
    entity_id: sensor.outdoor_temperature
    on_value:
      then:
        - lvgl.label.update:
            id: weather_label
            text:
              format: "%.0f°C Outside"
              args: ['x']
Change sensor.outdoor_temperature to your actual entity ID. If you’re not sure what yours is called, go to Developer Tools > States in Home Assistant and search for “temperature” to find it.
Using a weather entity instead? If your temperature comes from a weather.* entity (like from Ecobee, Environment Canada, or OpenWeatherMap), the temperature is stored as an attribute, not the main state. Add attribute: temperature to pull it out:
sensor:
  - platform: homeassistant
    id: outdoor_temp
    entity_id: weather.your_weather_entity
    attribute: temperature
    on_value:
      then:
        - lvgl.label.update:
            id: weather_label
            text:
              format: "%.0f°C Outside"
              args: ['x']
The %.0f formatting rounds the temperature to a whole number. If you want one decimal place, use %.1f instead. And if you’re in the US and want Fahrenheit, your sensor probably already reports in °F… just change the label text to "%.0f°F Outside".
Click Install > Wirelessly.
How to verify this step worked: After reboot, the weather label should show your outdoor temperature below the date. If it stays blank, check that your entity ID is correct. The most common mistake here is a typo in the entity ID or using an entity that reports as a string rather than a number. Check the ESPHome logs if the value isn’t showing up.
Step 6: Set Up Notification Pop-ups
This is what makes the clock more than just a clock. We’re going to create a text helper in Home Assistant that any automation can write to, and the display will show whatever text lands in it for 10 seconds.
Create the Helper in Home Assistant
Go to Settings > Devices & Services > Helpers (tab at the top). Click + Create Helper and choose Text. Set these values:
- Name: Bedside Notification
- Icon: mdi:message-alert (or whatever you prefer)
- Minimum length: 0
- Maximum length: 100
Click Create. This gives you an input_text.bedside_notification entity you can set from any automation, script, or the developer tools.
Add the Listener in ESPHome
Add this section to your ESPHome config:
text_sensor:
  - platform: homeassistant
    id: notification_text
    entity_id: input_text.bedside_notification
    on_value:
      then:
        - if:
            condition:
              lambda: 'return x.length() > 0;'
            then:
              - lvgl.label.update:
                  id: notification_label
                  text: !lambda 'return x;'
              - lvgl.widget.show: notification_label
              - delay: 10s
              - lvgl.widget.hide: notification_label
When HA sets the helper text to anything non-empty, the display shows it in orange for 10 seconds and then hides it again. The hidden: true we set on the notification label back in Step 4 means it’s invisible until a notification triggers it.
Click Install > Wirelessly.
How to verify this step worked: Go to Developer Tools > States in Home Assistant. Find input_text.bedside_notification in the entity list. Set its state to something like “Test notification” and click Set State. You should see the text pop up on the display in orange, then disappear after 10 seconds.
Once you’ve confirmed it works, you can trigger it from any automation. For example, if you’re running ESPHome smart plugs for power monitoring or a 5G modem watchdog, those events can push a message to this display too. A simple HA automation that writes “Washing machine done” to the helper when your smart plug’s power drops below 5W for 2 minutes… that’s genuinely useful.
Step 7: Auto-Dim the Backlight for Nighttime
Nobody wants a bright screen at 3 AM. The backlight is already set up as a dimmable light entity in Home Assistant (we added it back in Step 3), so we just need an automation to control it.
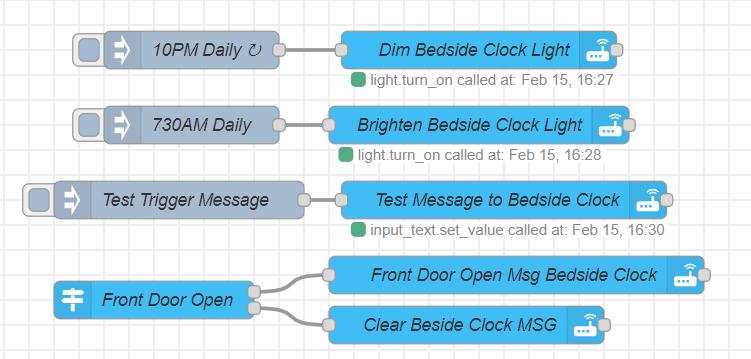
The backlight shows up as a standard light.display_backlight entity in Home Assistant, so you can automate it however you normally automate things… built-in automations, Node-RED, whatever you prefer. If you’re a Node-RED user, just point a time-triggered flow at the light entity with the brightness you want. Dead simple.
For the built-in automations crowd, go to Settings > Automations & Scenes > + Create Automation > Create New Automation. Switch to YAML mode (the three dots menu, top right) and paste this:
alias: Bedside Clock Brightness
description: Dim the clock at night, brighten during the day
triggers:
  - trigger: time
    at: "22:00:00"
    id: night
  - trigger: time
    at: "07:00:00"
    id: morning
actions:
  - choose:
      - conditions:
          - condition: trigger
            id: night
        sequence:
          - action: light.turn_on
            target:
              entity_id: light.display_backlight
            data:
              brightness_pct: 10
      - conditions:
          - condition: trigger
            id: morning
        sequence:
          - action: light.turn_on
            target:
              entity_id: light.display_backlight
            data:
              brightness_pct: 80
Save the automation. At 10 PM the display drops to 10% brightness, and at 7 AM it comes back up to 80%. Simple.
You could also add a BH1750 light sensor to the board’s I2C bus (the pins are already broken out on GPIO7/GPIO15) and dim based on actual room brightness. But for a first build, time-based works fine. Sometimes simple is just better.
How to verify this step worked: You don’t have to wait until 10 PM. Go to Developer Tools > Actions in Home Assistant. Select light.turn_on, target your light.display_backlight entity, and set brightness_pct to 10. Click Perform Action. The display should dim way down. Set it back to 80 when you’re done testing.
The Complete Config
If you followed along step by step, your full ESPHome YAML should look like everything from Steps 2 through 6 combined in one file. If anything isn’t working right, compare your config against each step’s code blocks and check for typos or missing sections. The ESPHome logs (click Logs on your device card) are your best friend for debugging… they’ll usually tell you exactly what went wrong.
For reference, the ESPHome LVGL documentation covers every widget type if you want to add more elements to the display, like arcs, gauges, or touch buttons. And the Waveshare wiki has the full pinout diagram if you want to add external sensors later.
Make It Yours
Now that the base clock is running, it’s pretty easy to tweak. Everything on the display is just an LVGL label, so changing colors, fonts, or positions is a one-line edit and an OTA flash. Swap text_color: 0x4FC3F7 on the weather label to something warmer. Bump the time font up to montserrat_48 or down to montserrat_28 depending on how far your nightstand is from your pillow. Move things around by changing the y values until the layout feels right to you.
You could also add more data to the display without much effort. Another sensor: platform: homeassistant block pulling in your indoor temperature, a humidity reading, or even your next calendar event as a text sensor. LVGL has room for it… 480×480 is a lot of pixels for a clock. The ESPHome LVGL documentation covers arcs, gauges, and progress bars if you want to get creative with the layout.
I’m already planning the next build with this same board (in my head at least)… a wall-mounted room controller with thermostat controls, light toggles, and scene buttons. That’s where the touchscreen really earns its keep. Different project though, and a bigger one.